> For the complete documentation index, see [llms.txt](https://docs.greennode.ai/llms.txt). Markdown versions of documentation pages are available by appending `.md` to page URLs; this page is available as [Markdown](https://docs.greennode.ai/vstorage/backup-voi-veeam/bat-dau-voi-veeam/buoc-4-phuc-hoi-du-lieu-tren-veeam.md).
# Step 4: Data Recovery on Veeam
You have created a Repository and a Job in the Veeam Backup & Replication software. Now you can perform data recovery in case of incidents with the configurations created on Veeam.
### Follow these steps to perform data recovery:
1. At **Home**, select **Backups/Object Storage**, select the backed-up Job, choose the Computer. Right-click and select "**Restore guest files**" then choose "Microsoft Windows";
2. In the "File Level Restore" screen, in the "**Restore Point**" tab, select the appropriate backup point from which you want to retrieve data, then click "**Next**".
3. In the "Reason" screen, enter the reason for data recovery, then click "**Next**".
4. In the "Summary" tab, then click "**Browse**".
5. The Backup Browse interface appears, navigate to the folder where data needs to be restored;
6. Click the "**Restore**" button on the menu bar, select "**Overwrite**";
7. The system automatically performs data recovery, after the recovery is complete, click "**Close**".
***
### Installation guide video
Updating
***
### Example: Guide to Data Recovery with Veeam Backup & Replication version 12
The following guide is to restore data in case of a file loss incident.
Here, the data in the folder E:\Backup\_Veem contains "Backup File" that is corrupted (or lost). To recover it, follow these steps:
1. At **Home**, select the **Backups/Object Storage** category.
Here, the user selects the Job that backed up the folder, then selects the computer on which the Job ran the backup. Right-click and select "**Restore guest files**" then choose "**Microsoft Windows**".
2. The "**File Level Restore**" interface appears, in the "**Restore Point**" tab, all backup points will be listed, the user only selects the backup point appropriate to retrieve the data. Then click "**Next**".
3. In the "**Reason**" tab, the user can fill in a description of why the file needs to be restored. Then click "**Next**".
4. In the "**Summary**" tab, a summary of the data recovery information is displayed. Then click "**Browse**".
5. The Backup Browse interface appears, navigate to the folder where data needs to be restored. (You can see the "lost file" that needs to be recovered is in the backup.
6. Click the "**Restore**" button on the menu bar, choose "**Overwrite**" (to overwrite the existing files).
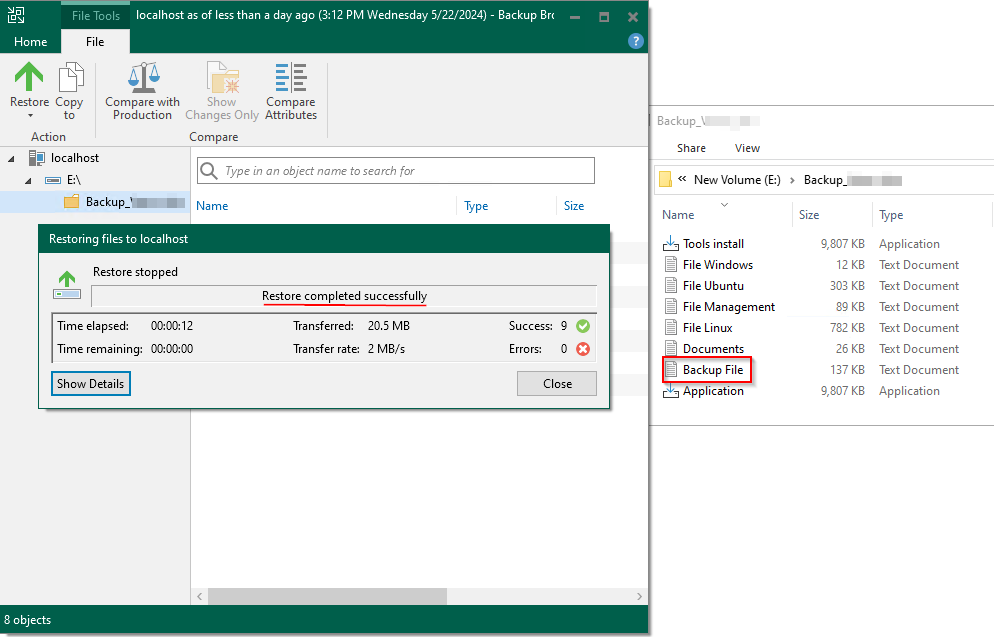
7. The system automatically performs data recovery:
8. When the system has completed processing, the user can see that the "lost file" has been successfully restored. Complete the data recovery process.
.png?alt=media)
.png?alt=media)
.png?alt=media)
.png?alt=media)
.png?alt=media)
.png?alt=media)
.png?alt=media)
.png?alt=media)