> For the complete documentation index, see [llms.txt](https://docs.greennode.ai/llms.txt). Markdown versions of documentation pages are available by appending `.md` to page URLs; this page is available as [Markdown](https://docs.greennode.ai/vstorage/backup-voi-veeam/bat-dau-voi-veeam/buoc-2-khoi-tao-repository.md).
# Step 2: Initialize Repository
Before performing a backup, you must create a storage location (Repository) where all the data you want to keep safe will be stored. Here are the instructions for initializing a Repository.
Additionally, Veeam provides the Scale-out Repository function, which can be understood as creating a Group Repository, helping you to back up data to multiple locations at the same time, ensuring high availability when troubleshooting.
### Follow these steps to initialize a Backup Repository:
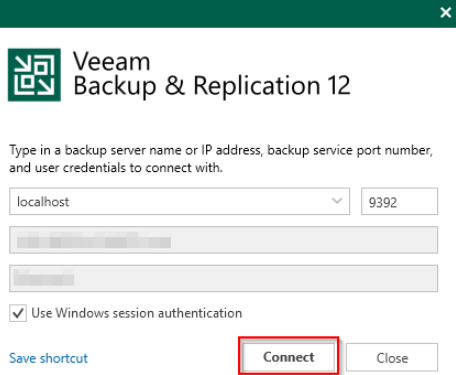
1. Open Veeam Backup & Repository software, enter login information, and click "**Connect**";
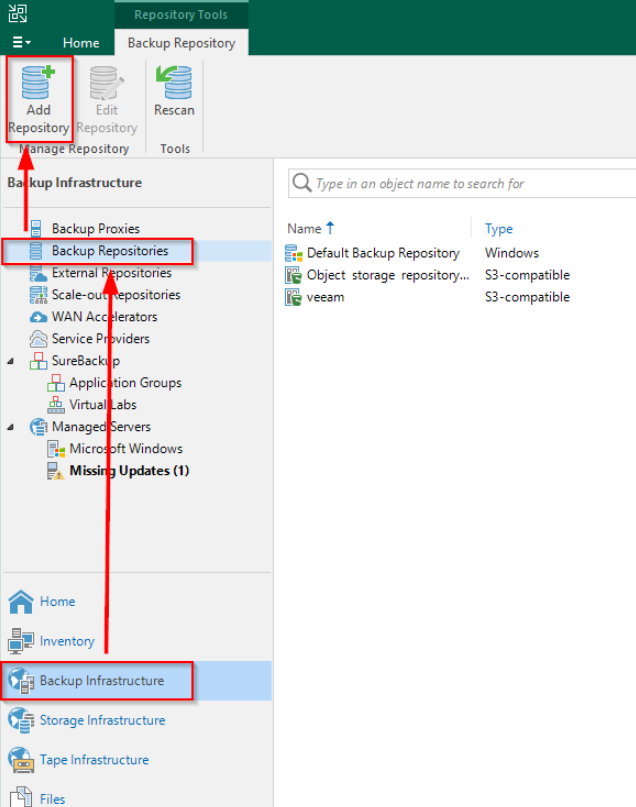
2. In "Backup Infrastructure", select "**Backup Repositories**", then click the "**Add Repository**" button;
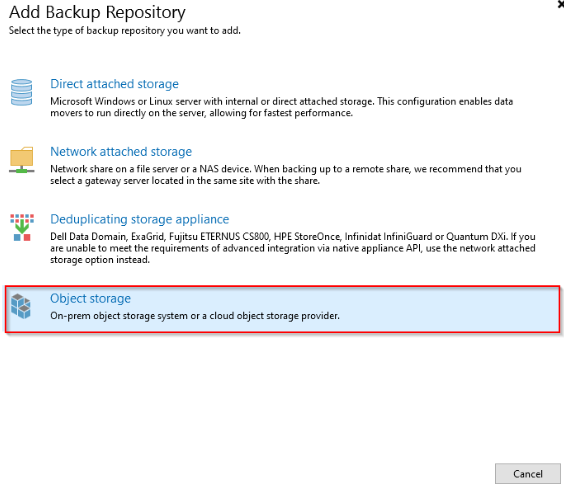
3. In the "Add Backup Repository" interface, select "**Object storage**";
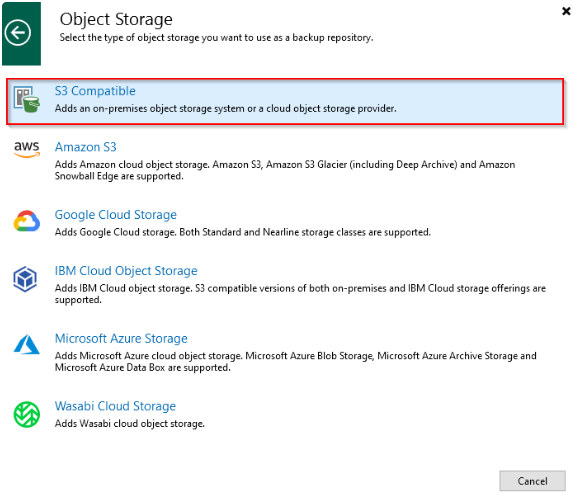
4. Choose "**S3 Compatible**";
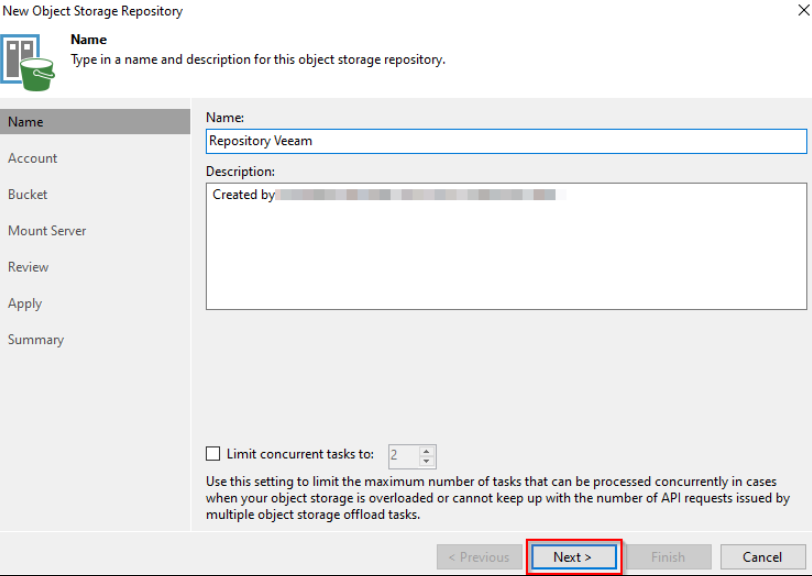
5. In the "New Object Storage Repository" interface, enter a name in the Name section and then click "**Next**";
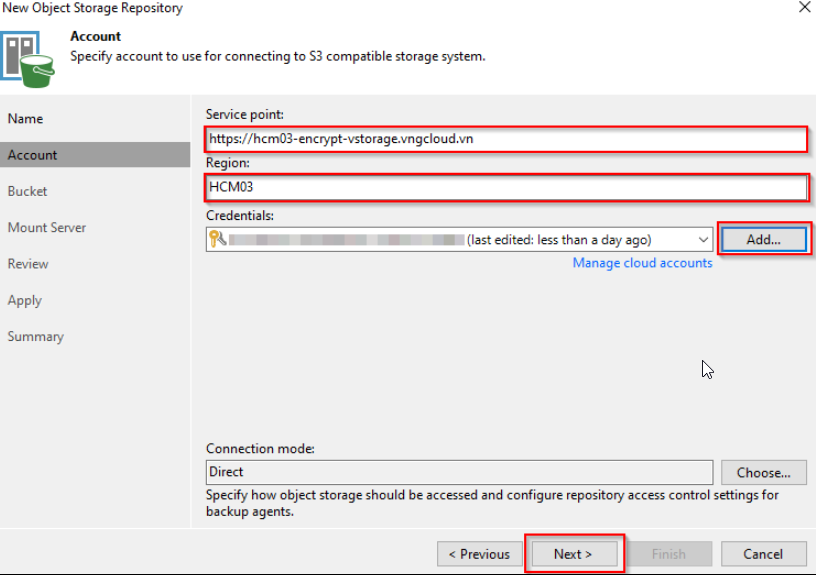
6. In the "Account" step, fill in the **Service Point, Region, Credentials** (with Access key and Secret key), then click "**Next**";
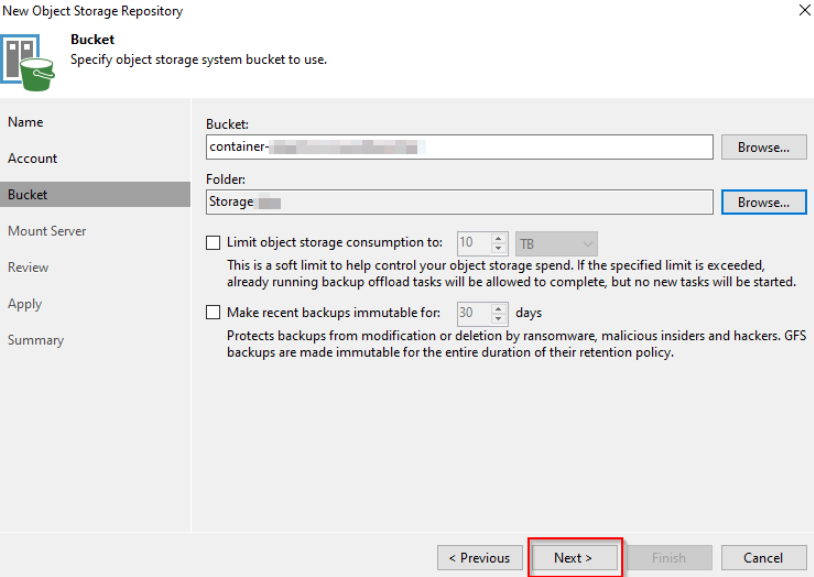
7. In the "Bucket" step, select the **Bucket and folder** to back up the data to. Then click "**Next**";
{% hint style="info" %}
**Important about Immutable:**
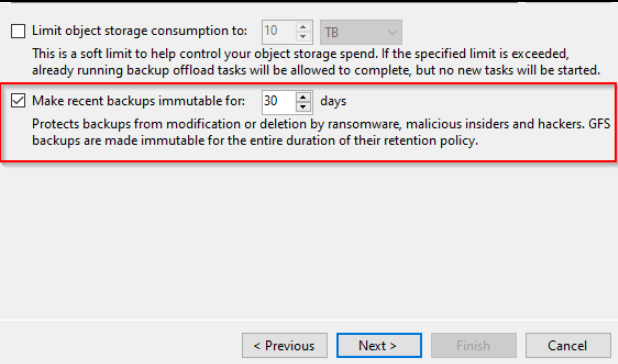
* You need to select the option: "**Make recent backups immutable for (30) days**";
* To protect the backups from being altered or deleted by other users, ransomware, or hackers. The backups are set to be immutable during this time.
{% endhint %}
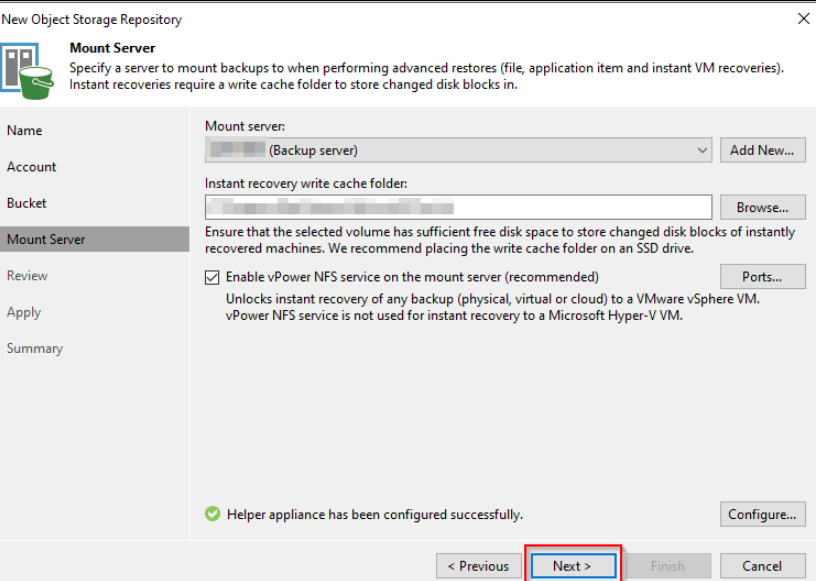
8. In the "Mount Server" step, click "**Next**";
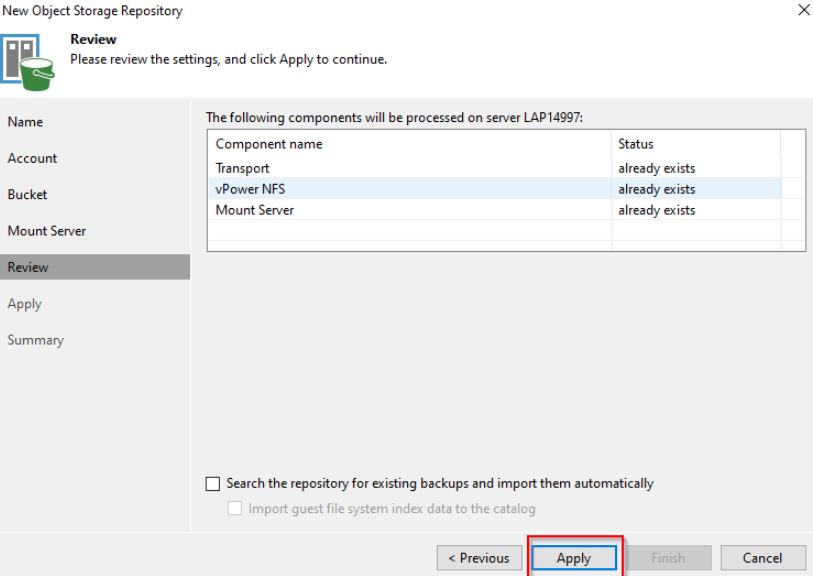
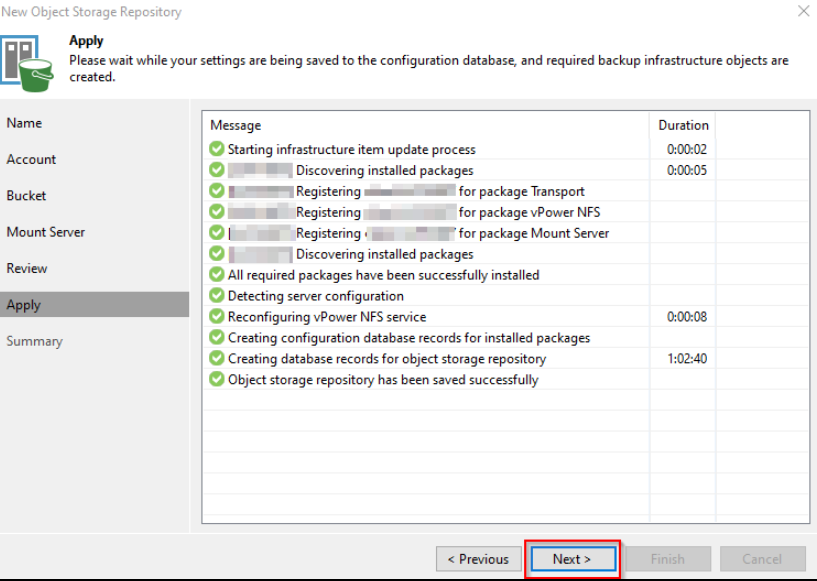
9. In the "Review" step, click "**Apply**". The system will process the creation of the Repository;
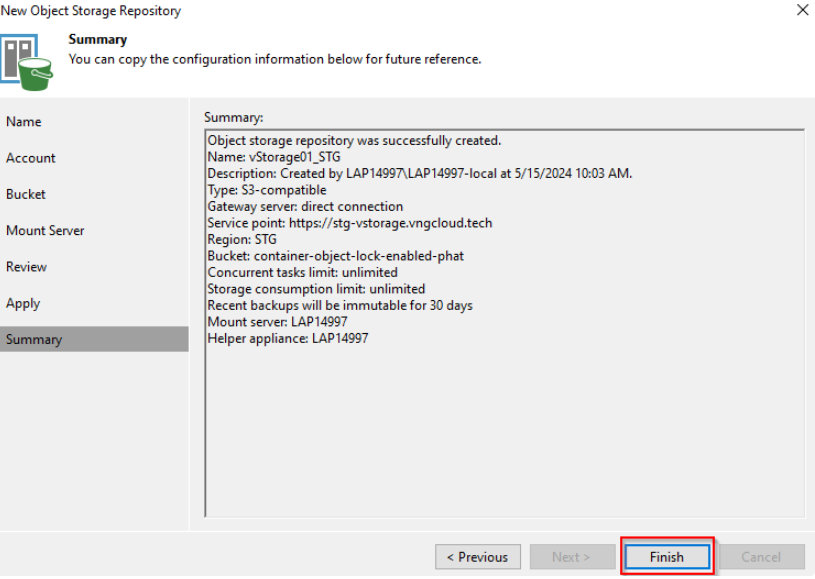
10. Click "**Finish**" to complete the Repository creation process.
***
### Follow these steps to initialize a Scale-out Repository:
1. Open Veeam Backup & Repository software, enter login information, and click "**Connect**";
2. In "Backup Infrastructure", select "**Scale-out Repositories**", right-click and select "**Add Scale-out backup Repository**";
3. In the "New Scale-out Backup Repository" interface, name the Repository, then click "**Next**";
4. Click "**Add**" to select the Backup Repositories (already created) you want to include in the Group Repositories;
{% hint style="info" %}
**Note:**
The Repositories must have the same Immutable configuration and be of the same Object Storage type.
{% endhint %}
5. In "Capacity Tier", continue to click "Apply". The system will process the creation of the Repository;
6. Click "**Finish**" once the creation is successful.
***
### Installation Guide Video
Updating
***
### Example: Creating Backup Repository guide with Veeam Backup & Replication version 12
**Step 1**: Access using the software;
**Step 2:** Select "**Backup Infrastructure**", then "**Backup Repositories**", click the "**Add Repository**" button to start setting up the Repository:
**Step 3**: In the Add Backup Repository screen, select the "**Object storage**" option.
**Step 4:** In the Object Storage screen, choose the "**S3 Compatible**" option or select the appropriate object choice for backup.
**Step 5:** Navigate to the "New Object Storage Repository" screen to start creating the Repository (backup location). In the "**Name**" step, users set the name and description for the Repository. Then click "**Next**".
**Step 6:** In the "**Account**" step, users fill in the following information and press "Next":
* Service Point:
* Region: **HCM03**
* Credentials: click "Add" to enter "**Access key**" and "**Secret key**". To create the key, refer to the guide on creating an [S3 key](/vstorage/object-storage/vstorage-hcm03/identity-and-access-management/managing-vstorage-access-account/service-account/vstorage-credentials/create-a-s3-key.md).
**Step 7:** In the "Bucket" step, users select a previously created Container on vStorage (see the guide to creating a Container[ here](/vstorage/object-storage/vstorage-hcm03/features-of-vstorage/working-with-containers/create-a-container.md)). At the same time, users choose or create a new folder to store the backup data into that folder. Then click "Next".
**Note:** Users need to select the option: "Make recent backups **immutable** for 30 days". With this option, it helps protect the copy from risks and prevents modification or deletion of the backup over a certain period, ensuring a clean backup copy is always available for system restoration in case of attack or incident.
**Step 8:** In the "**Mount Server**" screen, users can choose the server needed to backup data, then click "**Next**".
**Step 9:** Users continue to press "**Apply**" at the Review screen.
**Step 10:** After pressing "**Apply**", the system will proceed to process the creation of the Repository.
**Step 11:** When completed, users press "**Finish**".
After completing the Repository creation process.