> For the complete documentation index, see [llms.txt](https://docs.greennode.ai/llms.txt). Markdown versions of documentation pages are available by appending `.md` to page URLs; this page is available as [Markdown](https://docs.greennode.ai/vstorage/backup-voi-veeam/bat-dau-voi-veeam/buoc-1-cai-dat-veeam-backup-and-replication.md).
# Step 1: Install Veeam Backup & Replication
To ensure data backup and recovery , the Veeam Backup $ Replication software needs to be installed. Only after a successful installation, you perform the functions of data backup and recovery.
### Follow these steps to install Veeam Backup & Replication:
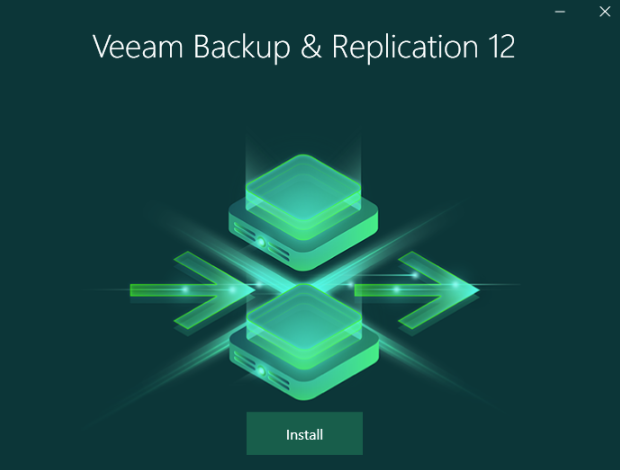
1. Select the Setup installation file, then click **Install** to start the installation process;
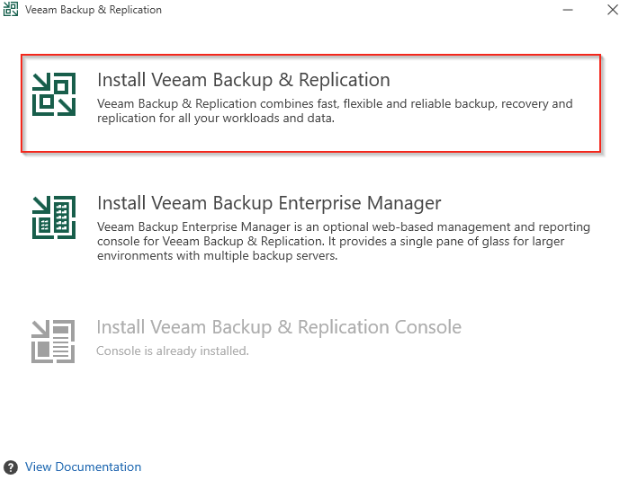
2. Click on "**Install Veeam Backup & Replication**";
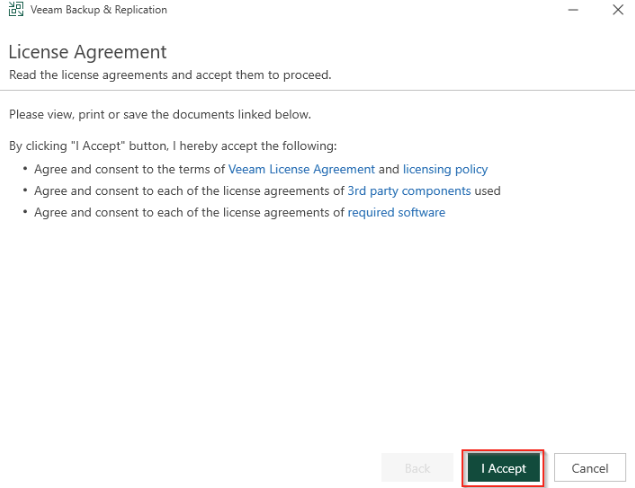
3. Click "**I Accept**" to agree to the software's license agreement and terms of use;
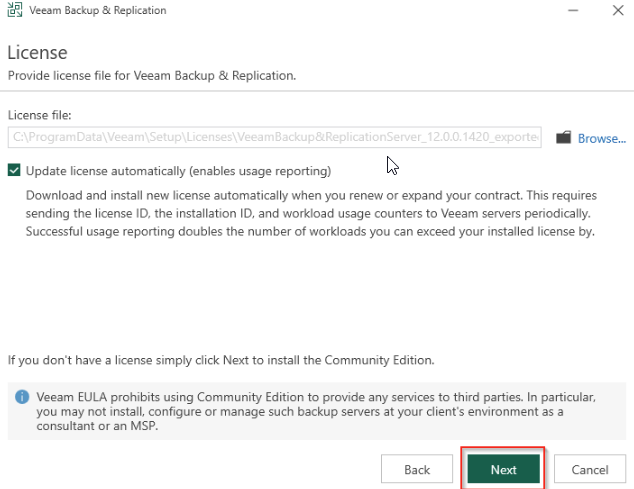
4. Enter the license information (if available), then click "**Next**";
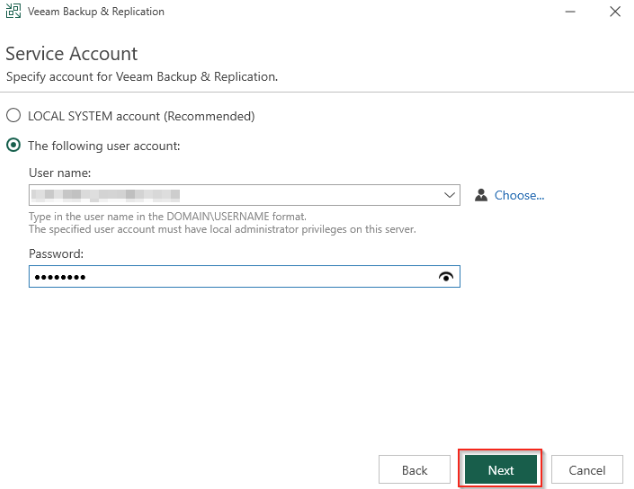
5. Enter **User Account** information, then click "**Next**";
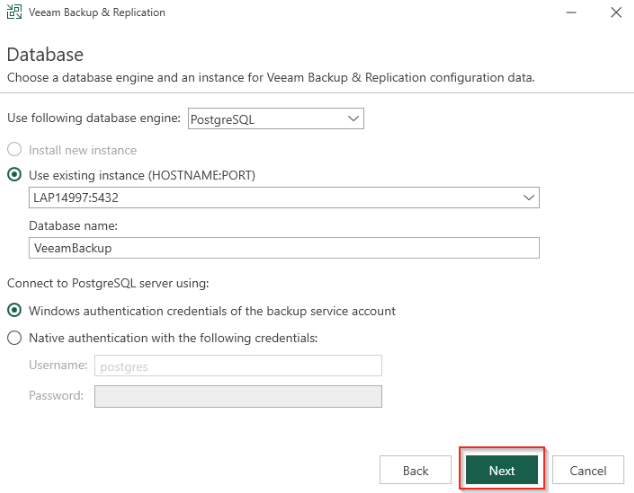
6. Enter **Database** information, then click "**Next**";
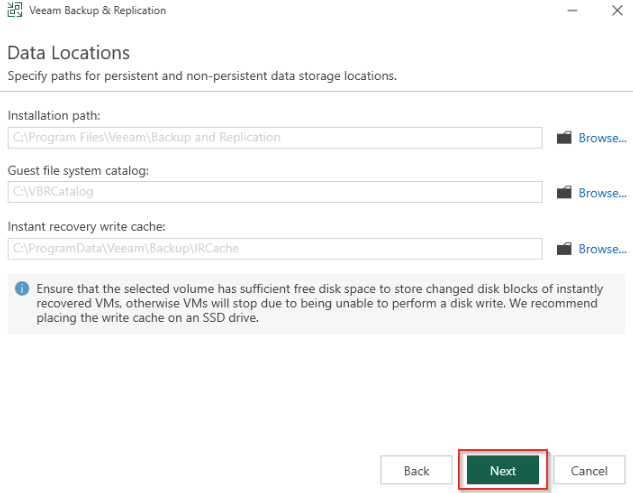
7. Choose the path for data storage, then click "**Next**";
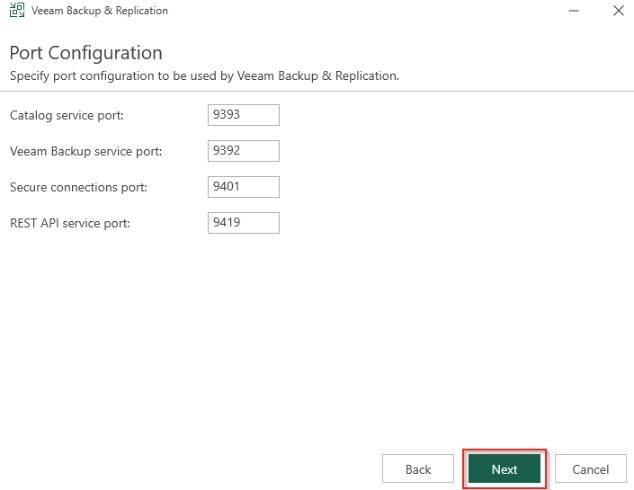
8. Specify the service port, then click "**Next**";
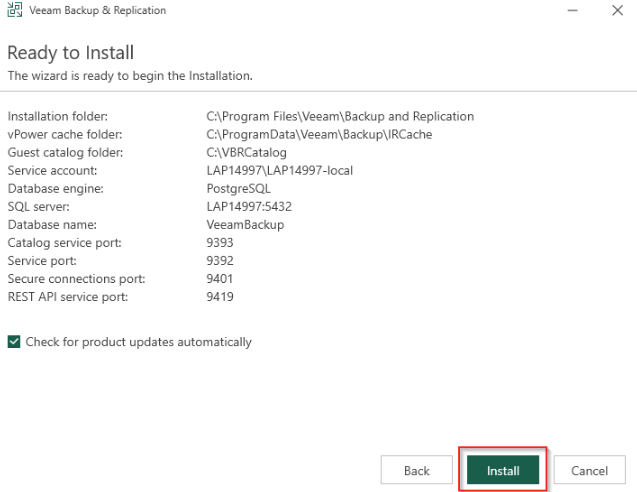
9. Click "**Install**" to begin the software installation process;
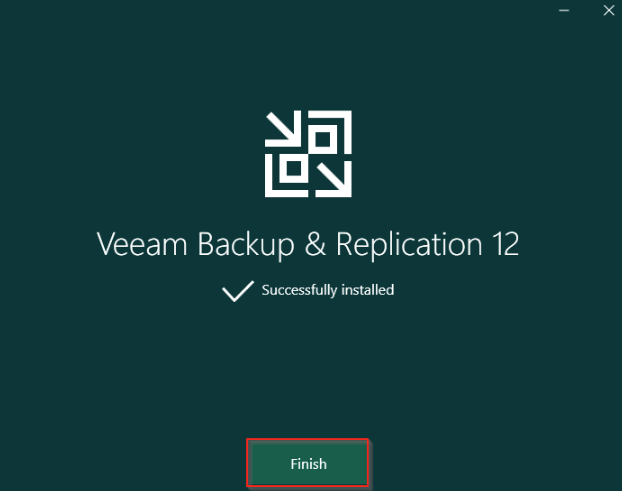
10. Click "**Finish**" to complete the installation.
***
### Installation guide video
Updating.
***
### Example: Installation guide Veeam Backup & Replication version 12
1. After customers download the Veeam Backup & Replication installer (or contact the GreenNode technical team for assistance in downloading the software), they should select the Veeam setup file and click Install to begin the installation process.
2. Click on "**Install Veeam Backup & Replication**";
3. The software checks, if the device already has Veeam installed; if so, you can Repair or Remove Veeam. If the device does not have Veeam installed, proceed to step 4.
4. Veeam Backup & Replication software advises customers to read the information regarding the software's license agreement and terms of use. If they agree, customers can click "**I Accept**" to continue.
5. Enter the license information (option to enter the license later), customers can click "**Next**."
6. Enter the Local System Account information or specify an account with server permissions, then click "**Next**".
7. Enter the SQL server-DB information for Veeam, then click "**Next**."
8. Customers can choose the path for data storage, then click "**Next**."
9. Customers specify the service port, then click "**Next**."
10. Customers should review the information they have selected for installation, then click "**Install**" to begin the software installation process.
10. Click "**Finish**" to complete the installation process of Veeam Backup & Replication. Customers can then open the software and begin using it.