> For the complete documentation index, see [llms.txt](https://docs.greennode.ai/llms.txt). Markdown versions of documentation pages are available by appending `.md` to page URLs; this page is available as [Markdown](https://docs.greennode.ai/vcdn/loai-hinh-dich-vu/transcoding-and-advanced-features/use-cases/create-simultaneous-restream-channels-to-multiple-platforms-rtmp.md).
# Create Simultaneous Restream Channels to Multiple Platforms (RTMP)
To create a Restream channel on multiple platforms simultaneously, follow these instructions:
## Install Sigma Media Server
First, you need to install Sigma Media Server following the steps [here](https://docs-vngcloud-vn.translate.goog/vng-cloud-document/vn/vcdn/loai-hinh-dich-vu/transcoding/cai-dat-sigma-media-server) .
## Initialize and configure Media Service for livestreaming.
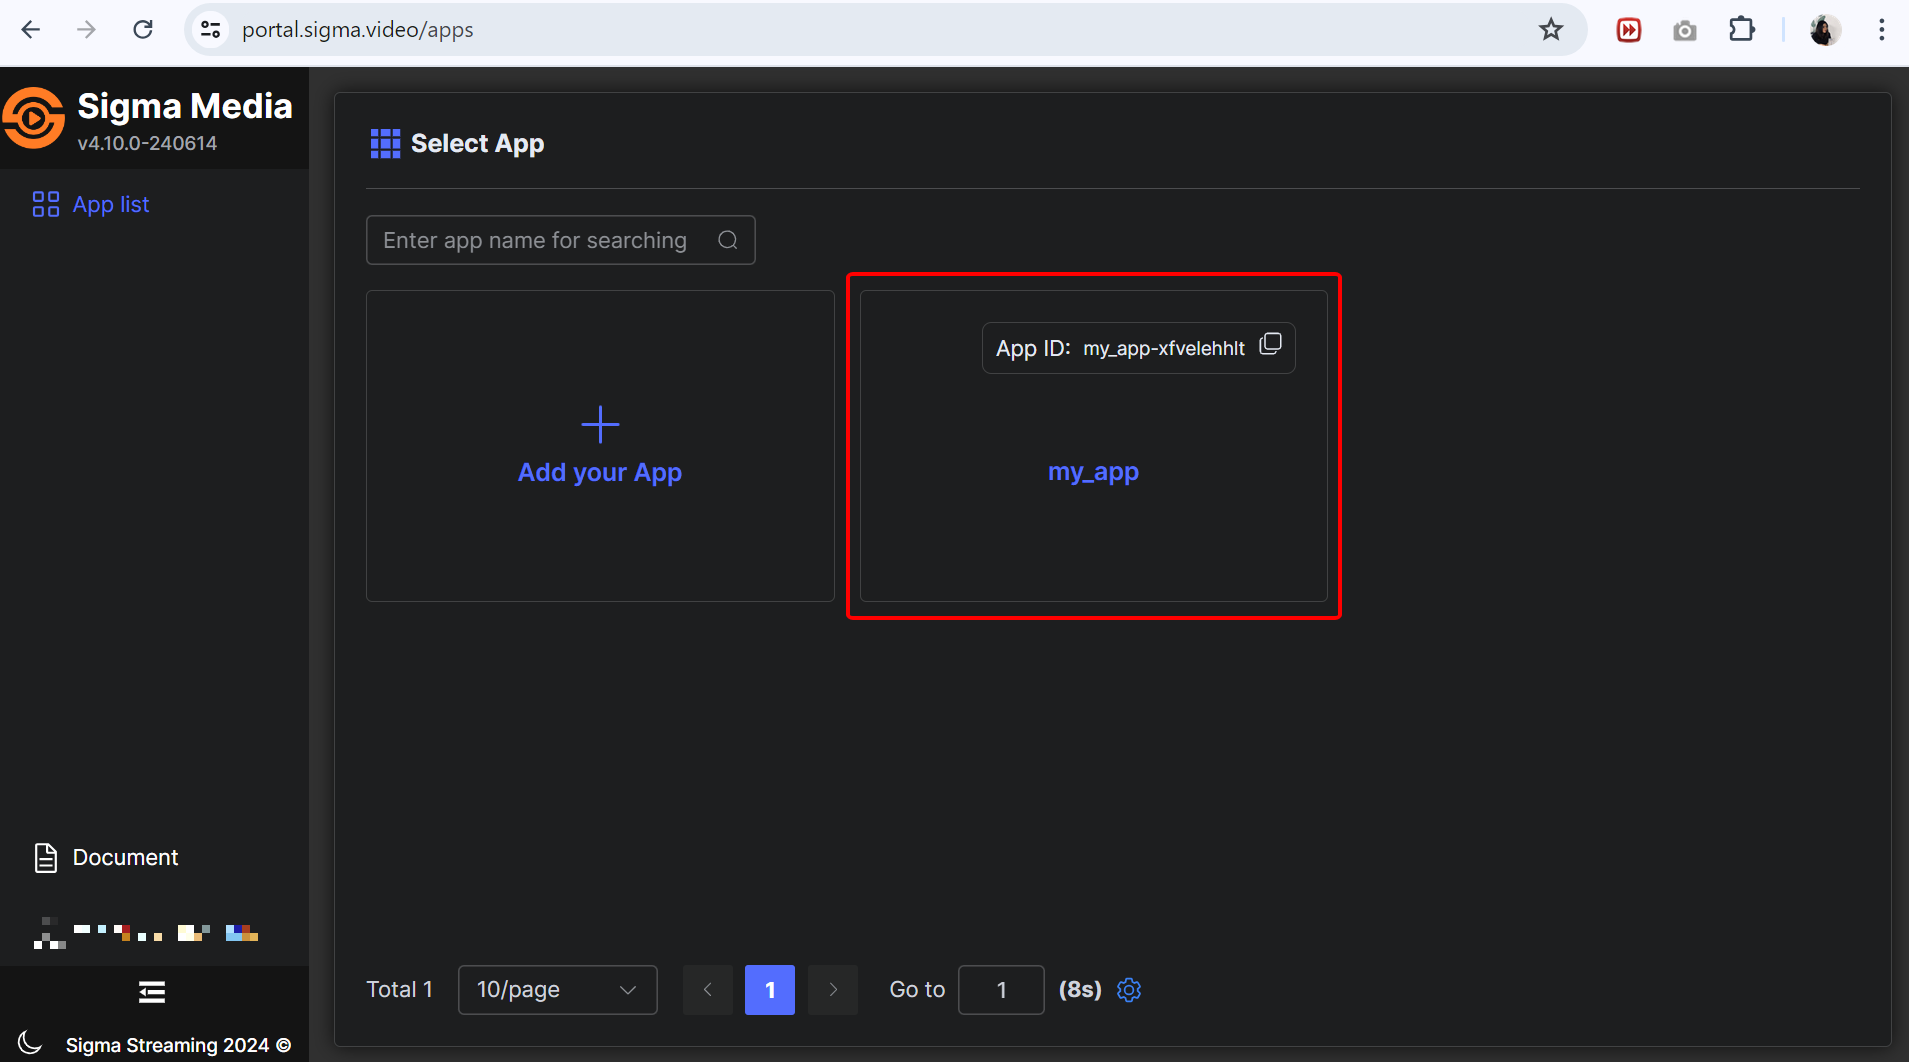
**Step 1:** After successfully installing **Sigma Media Server** , access with the email you previously registered to use the service.
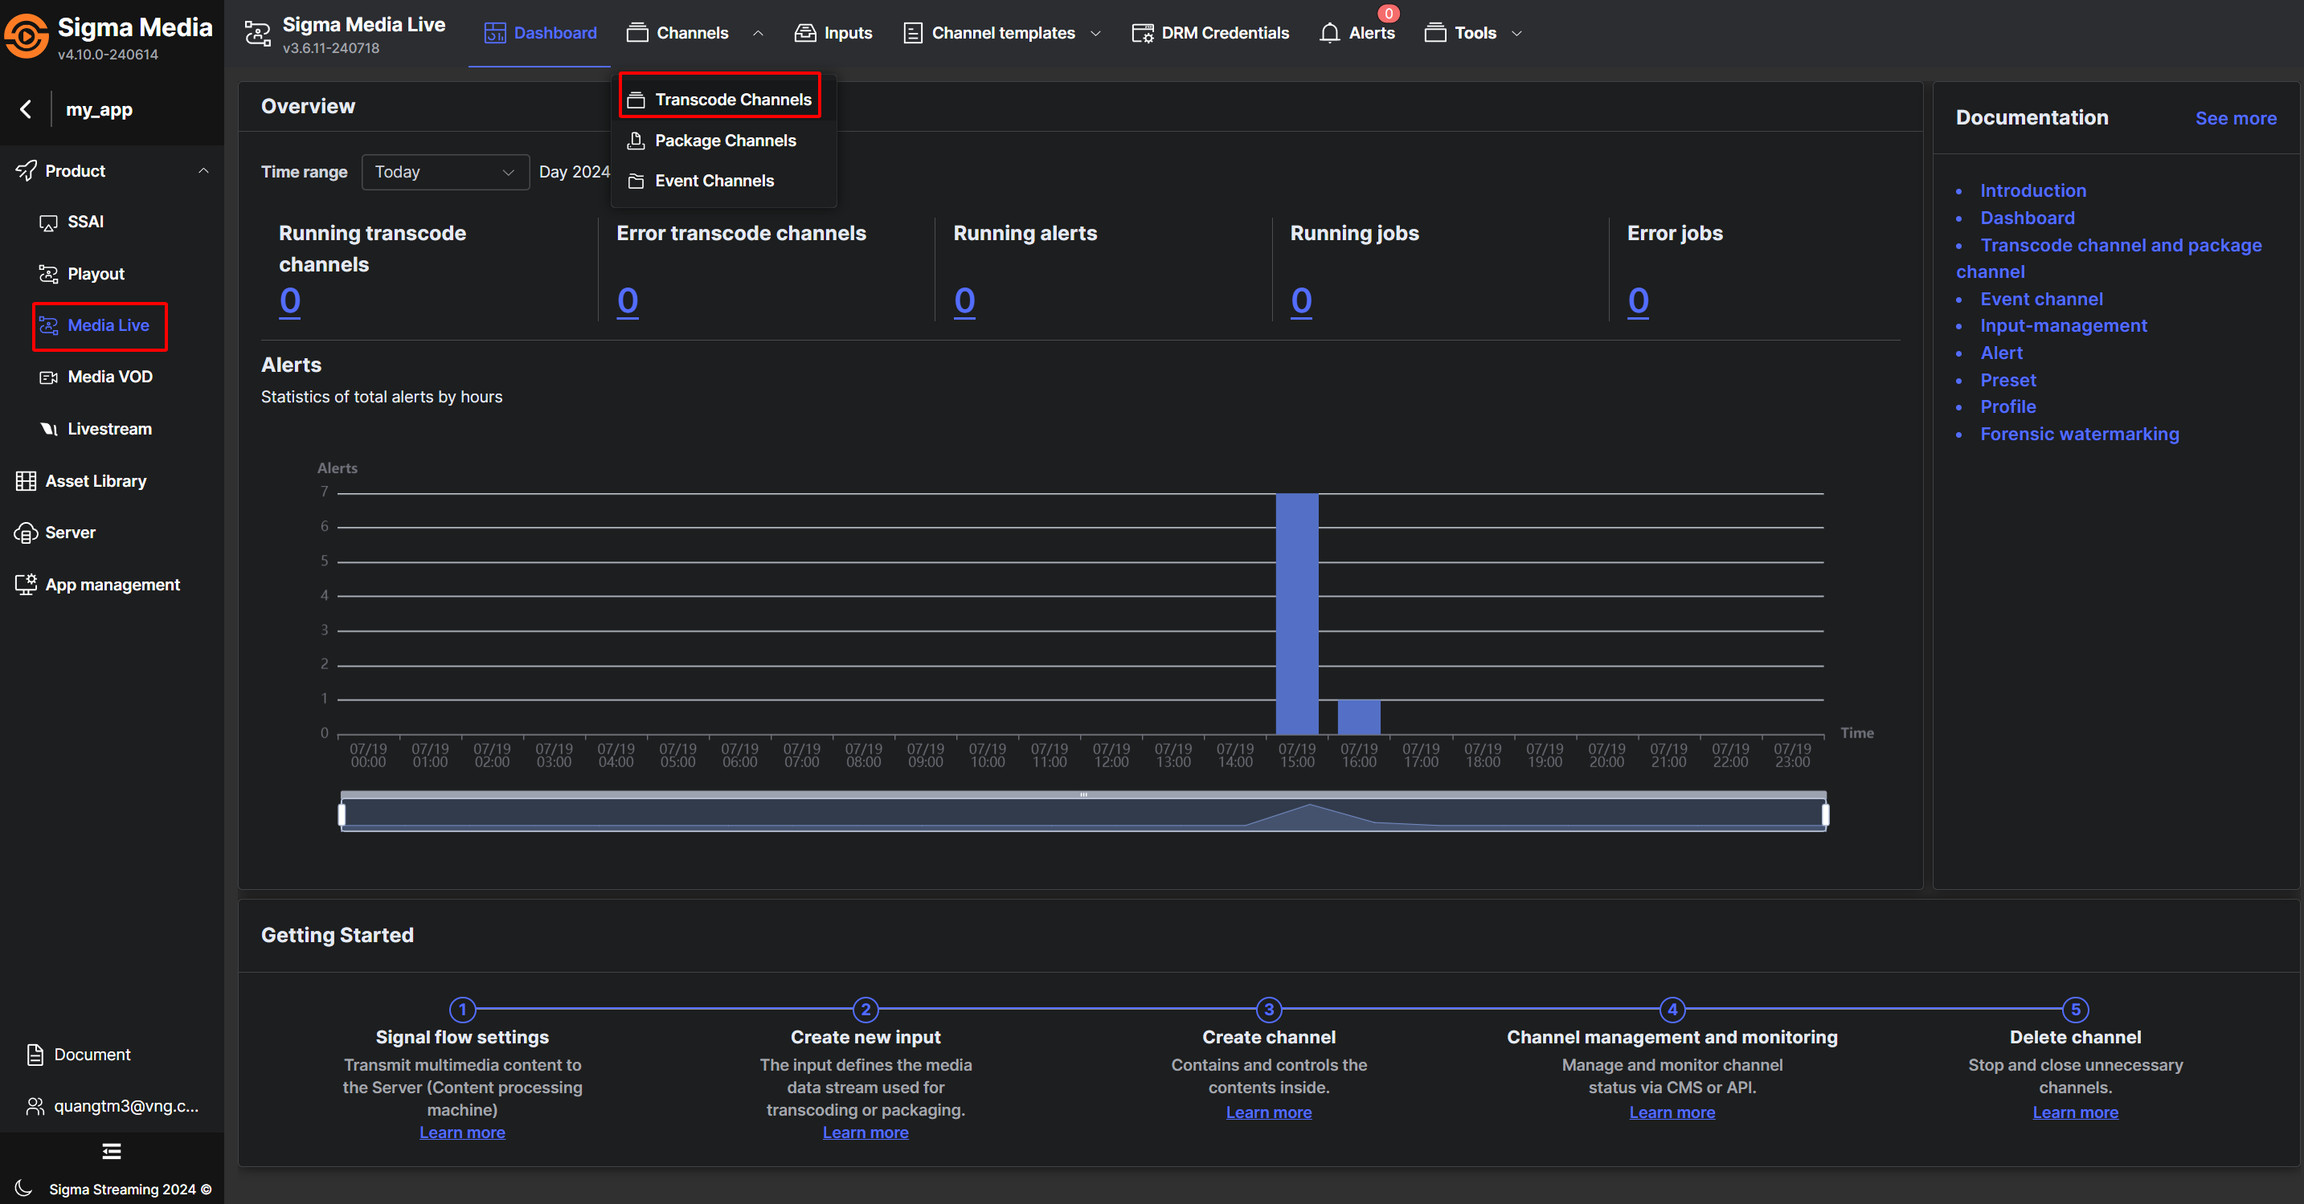
**Step 2:** Select the **Product** drop-down menu and select **Media Live.** Next, select the **Channel tab -> Transcode channels**
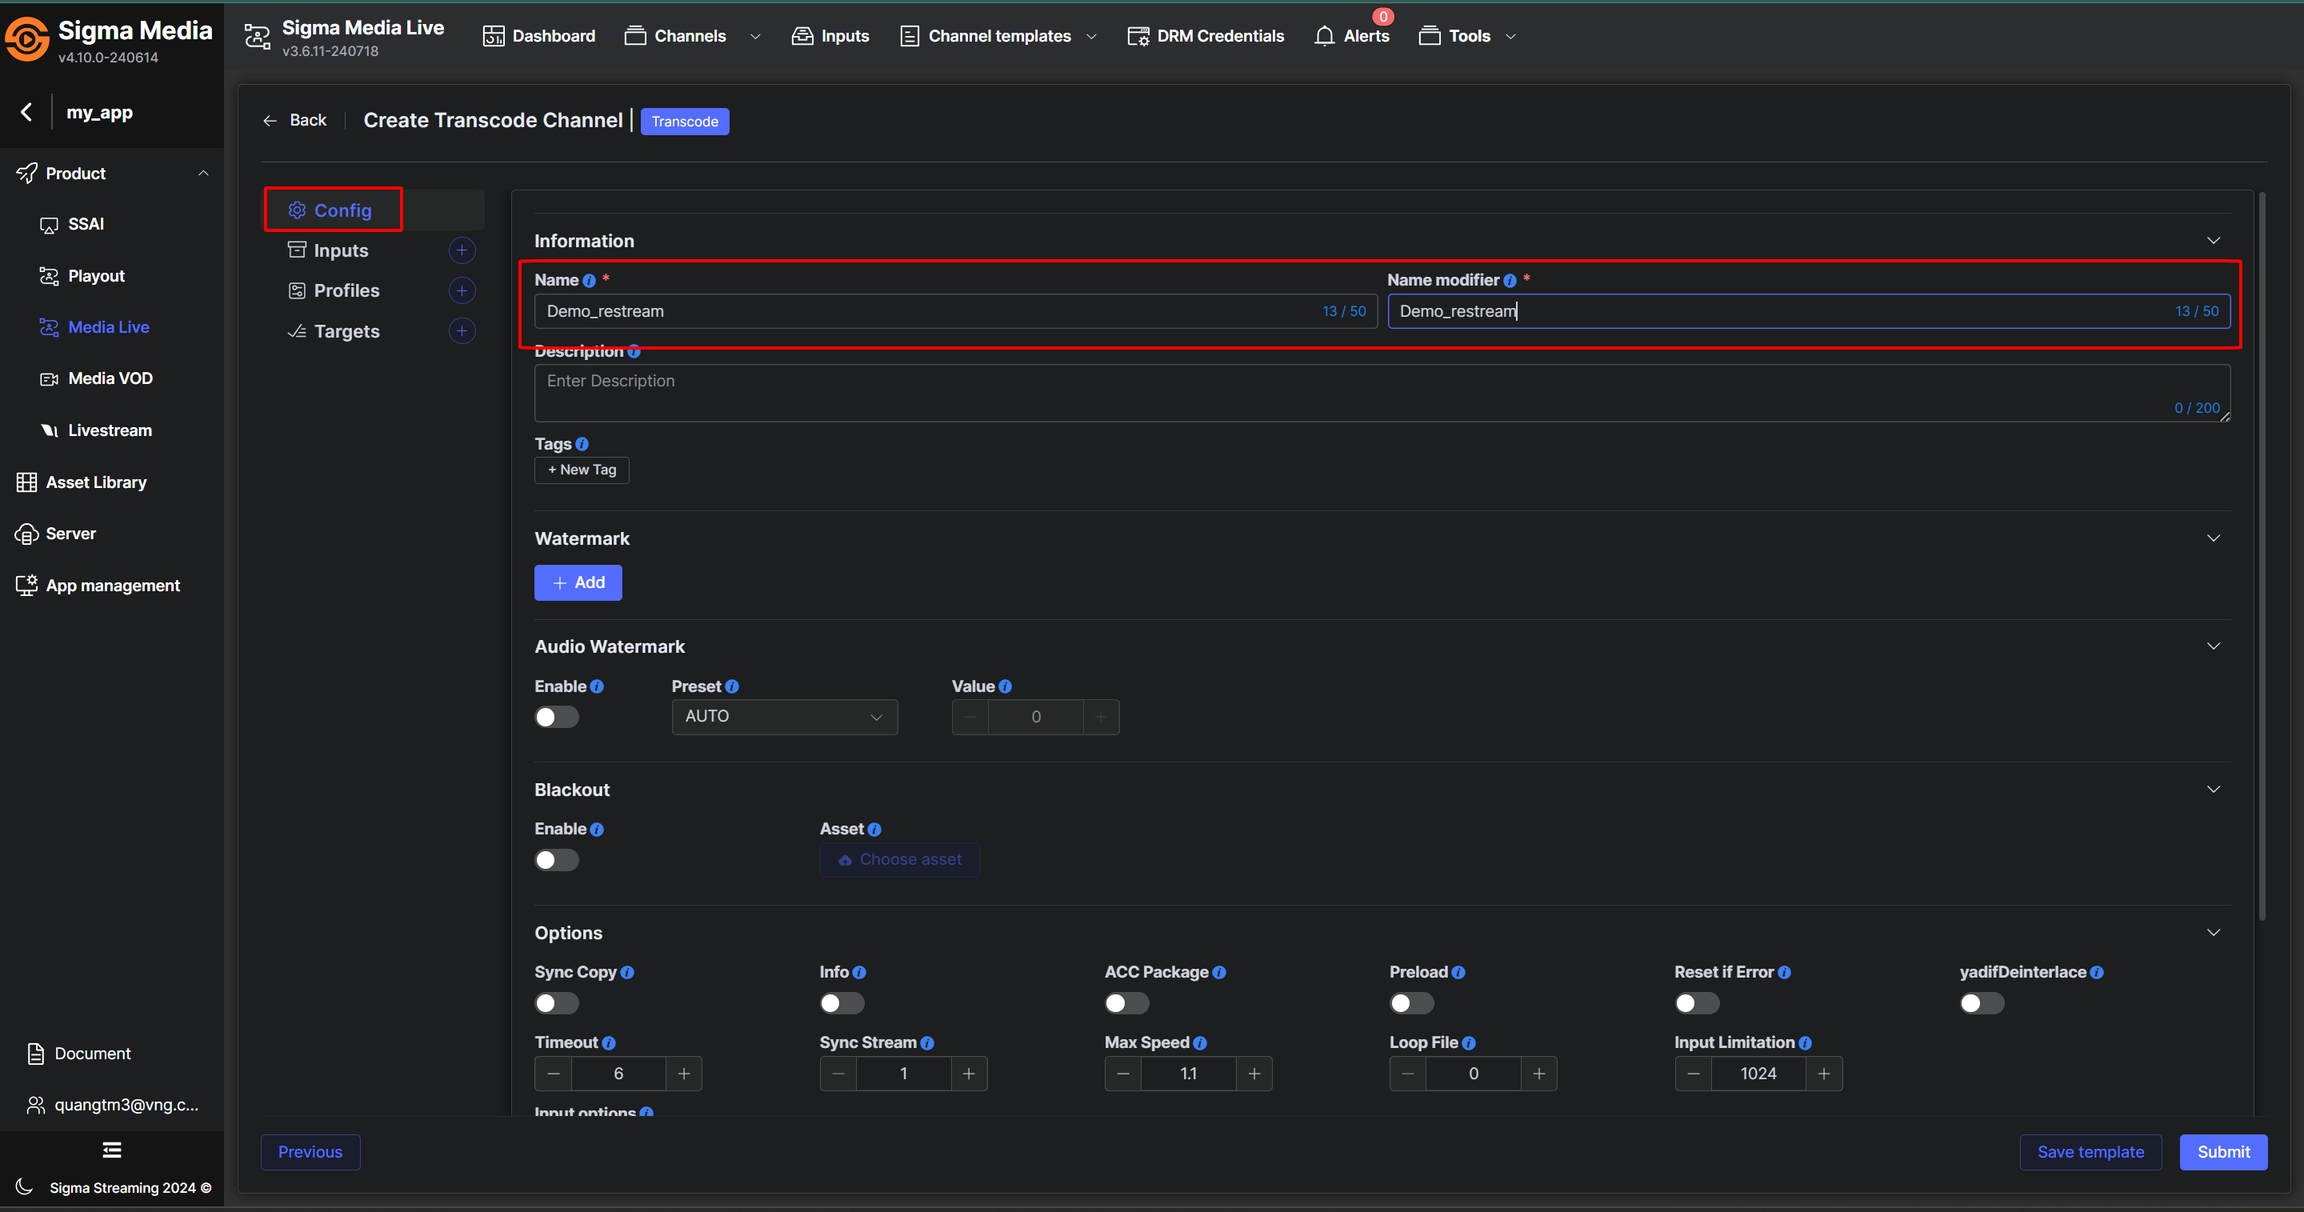
**Step 3:** Select the **Add button in the right corner. The Create Transcode Channel** screen appears, in the Config tab, you need to enter basic information for the channel including **Name** and **Name Modifier**
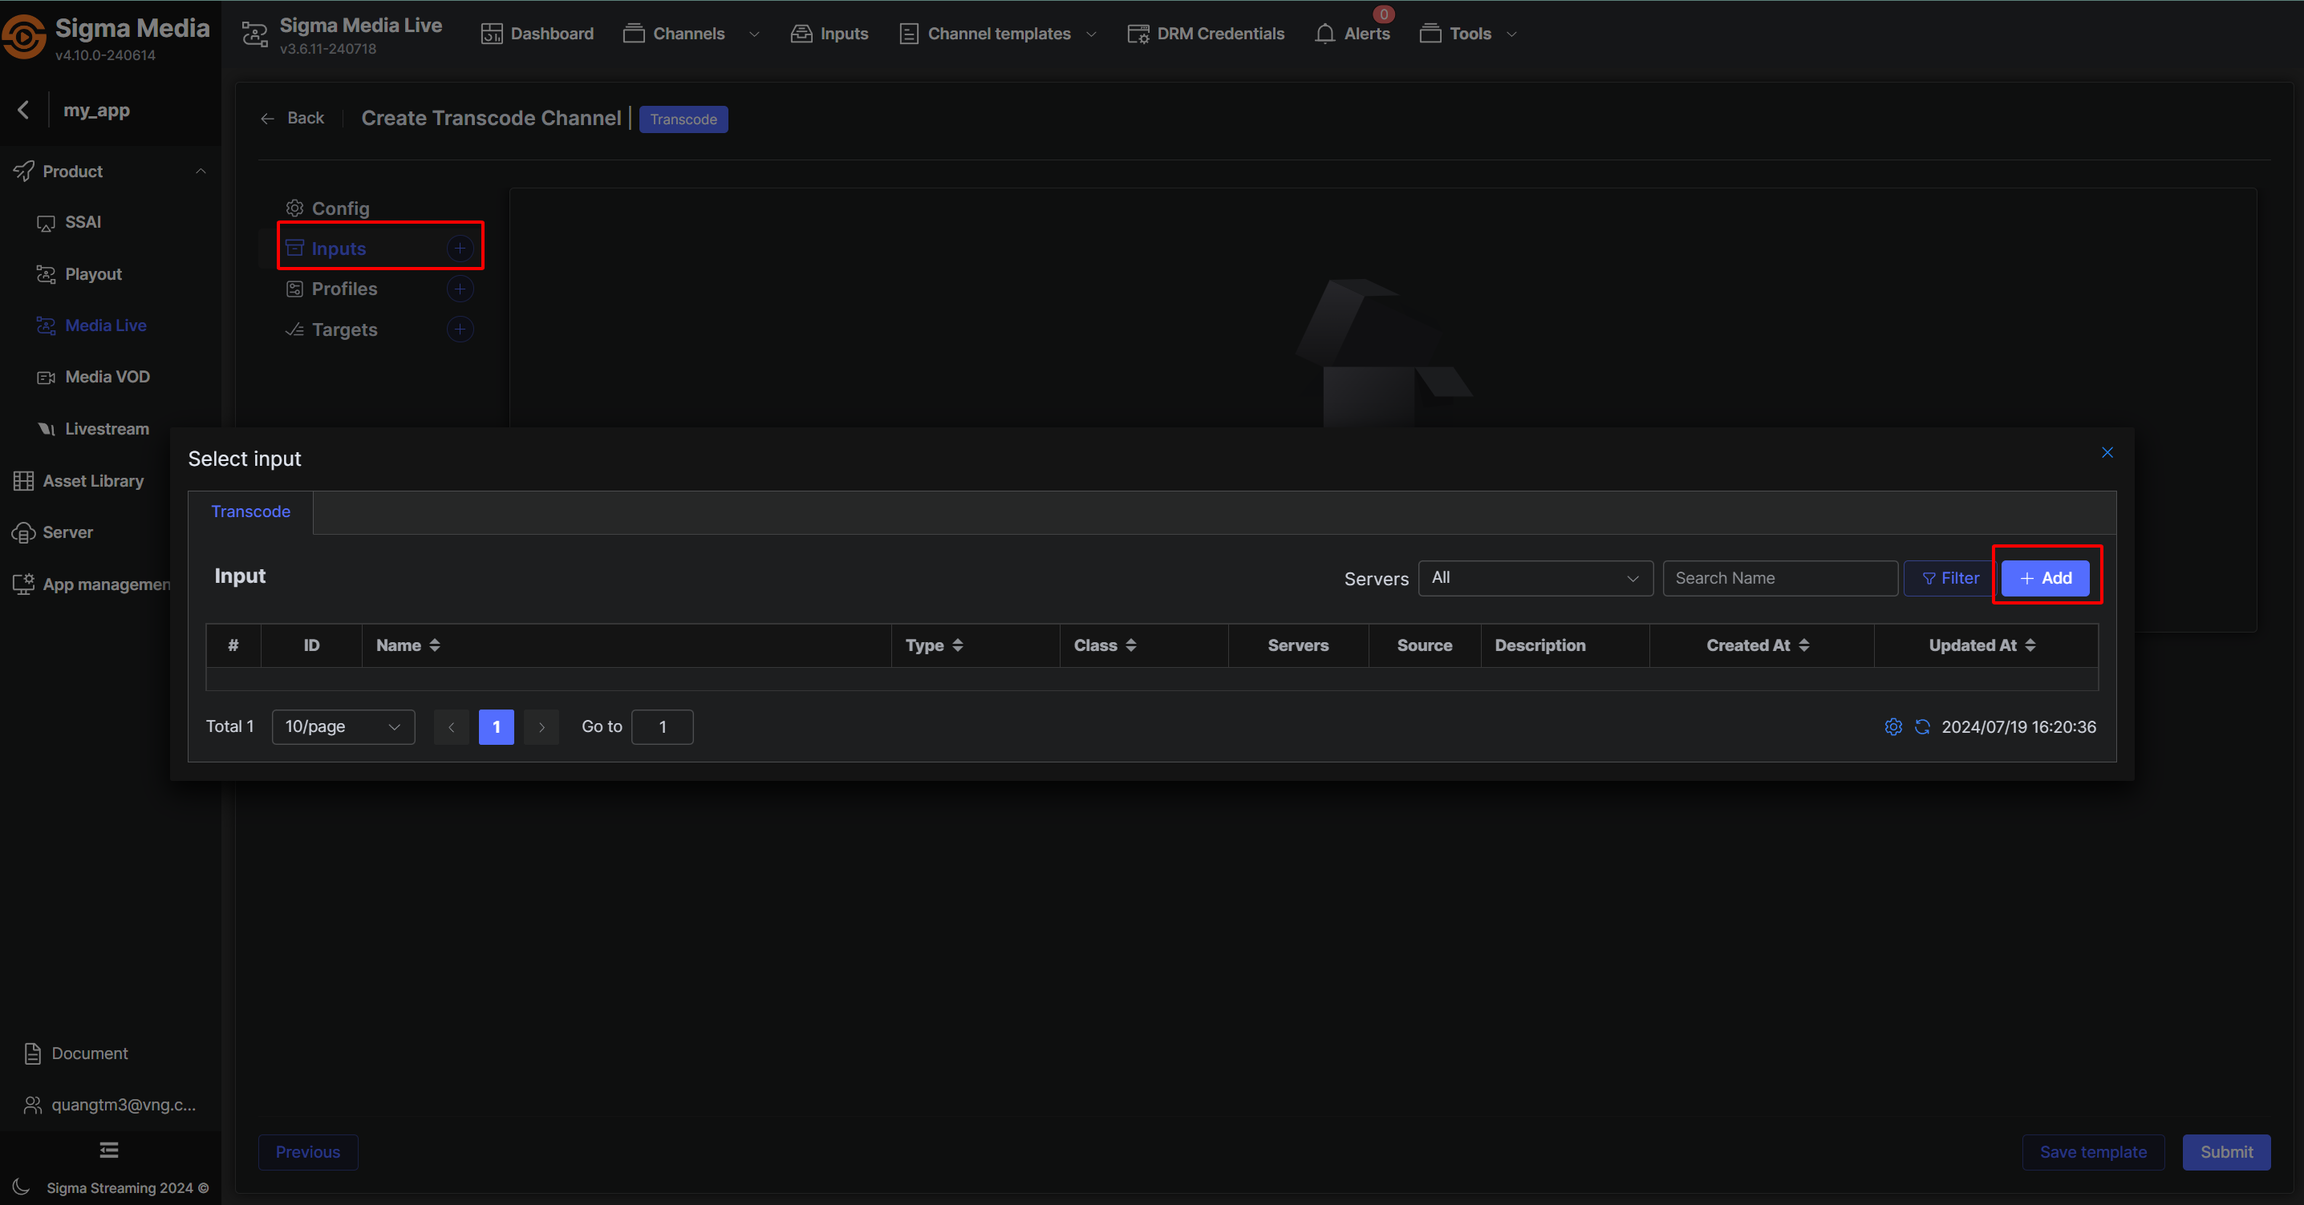
**Step 4:** Continue to configure the input in the **Input tab**
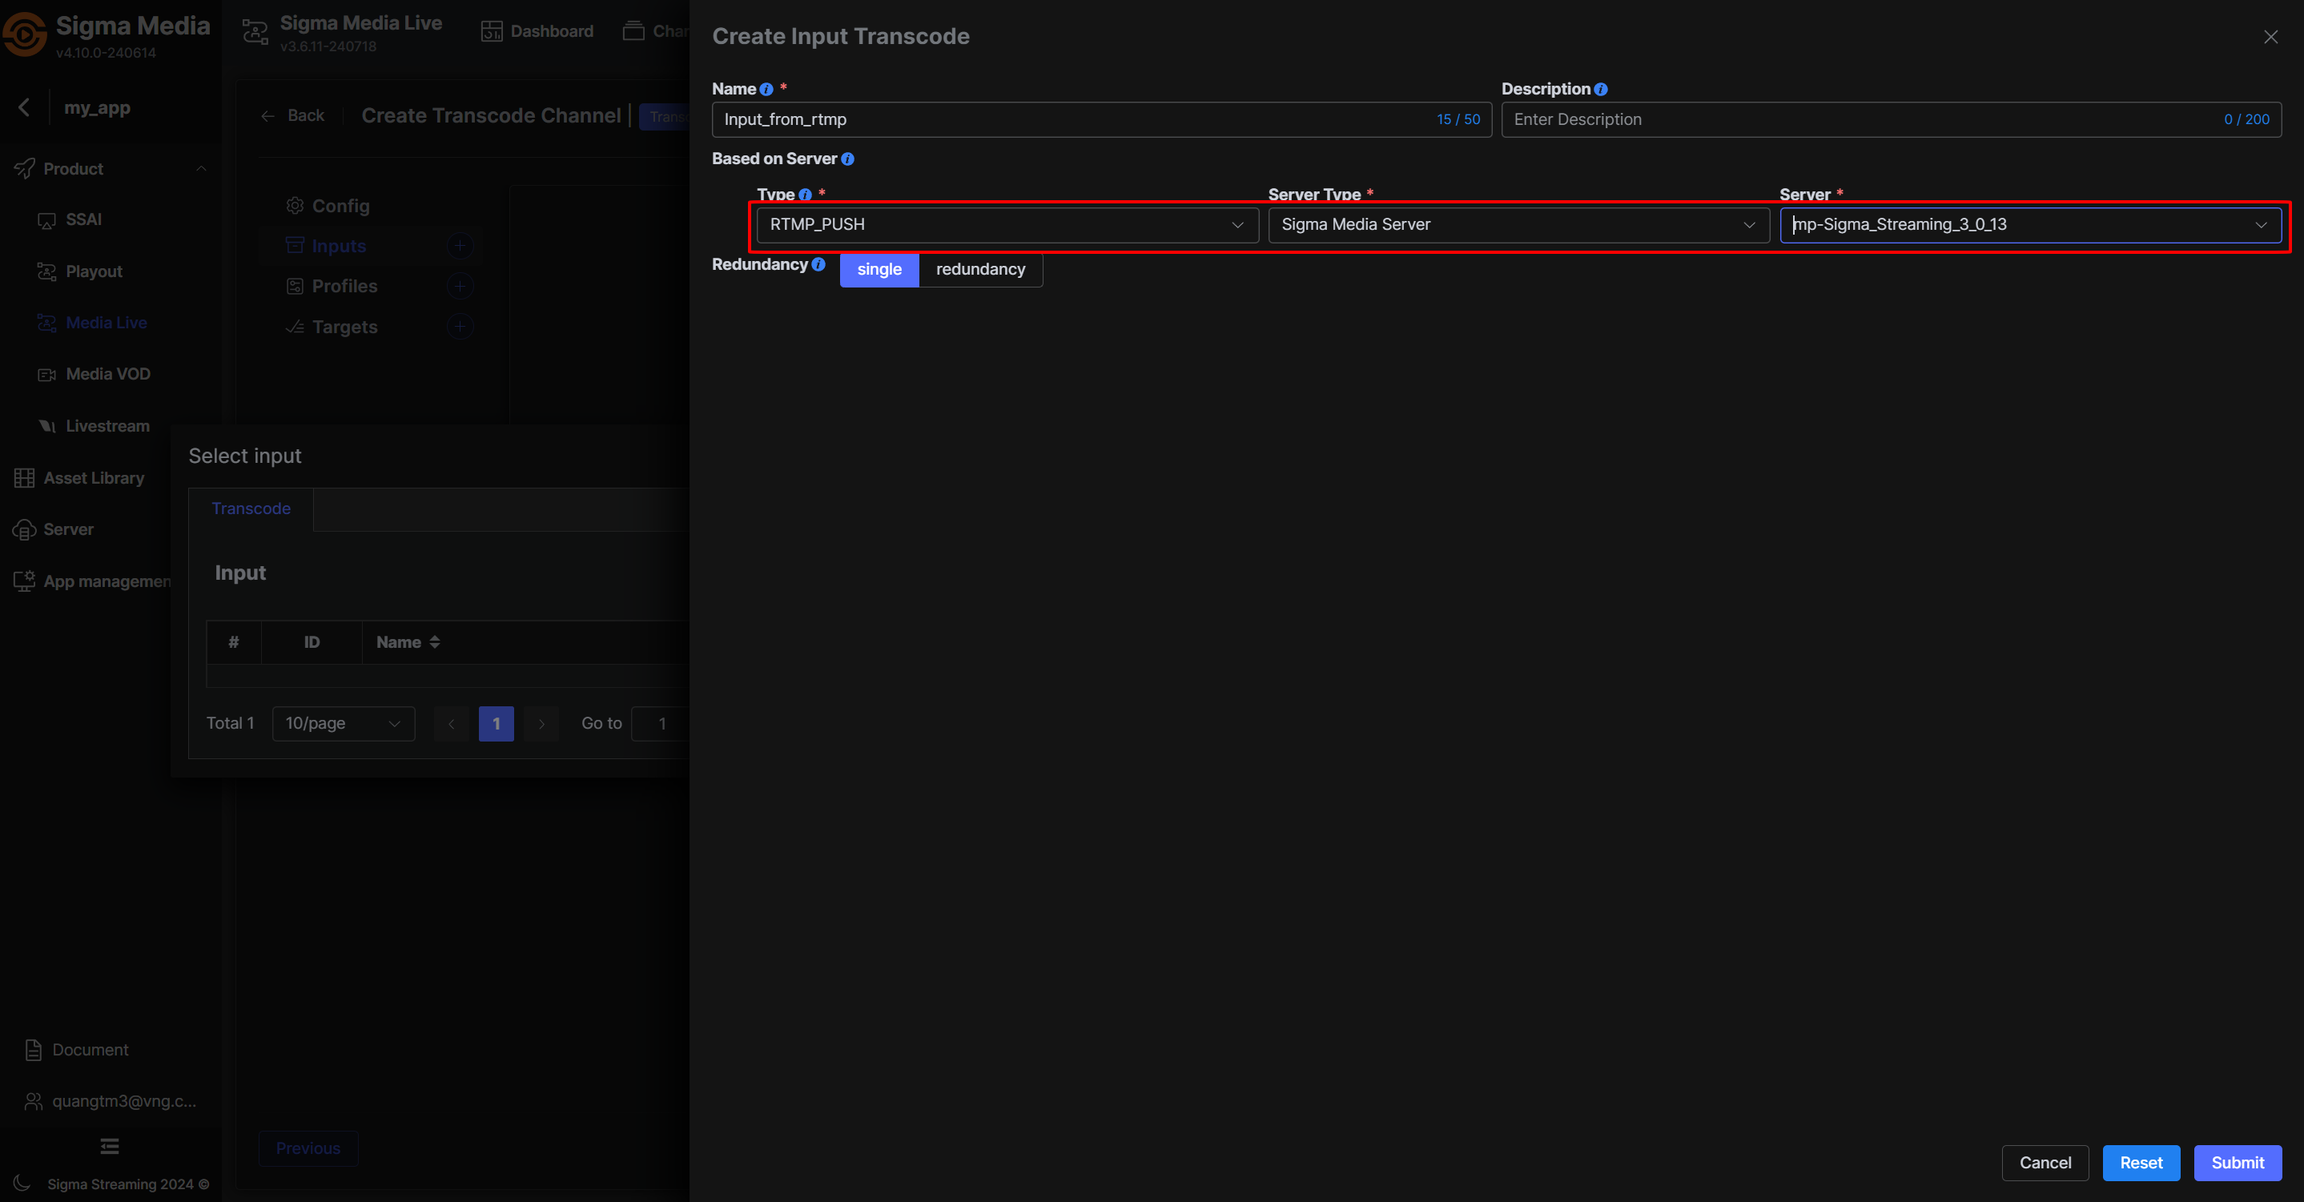
**Step 5: At the Create Input Transcode** screen , select the **RTMP** input type as follows:
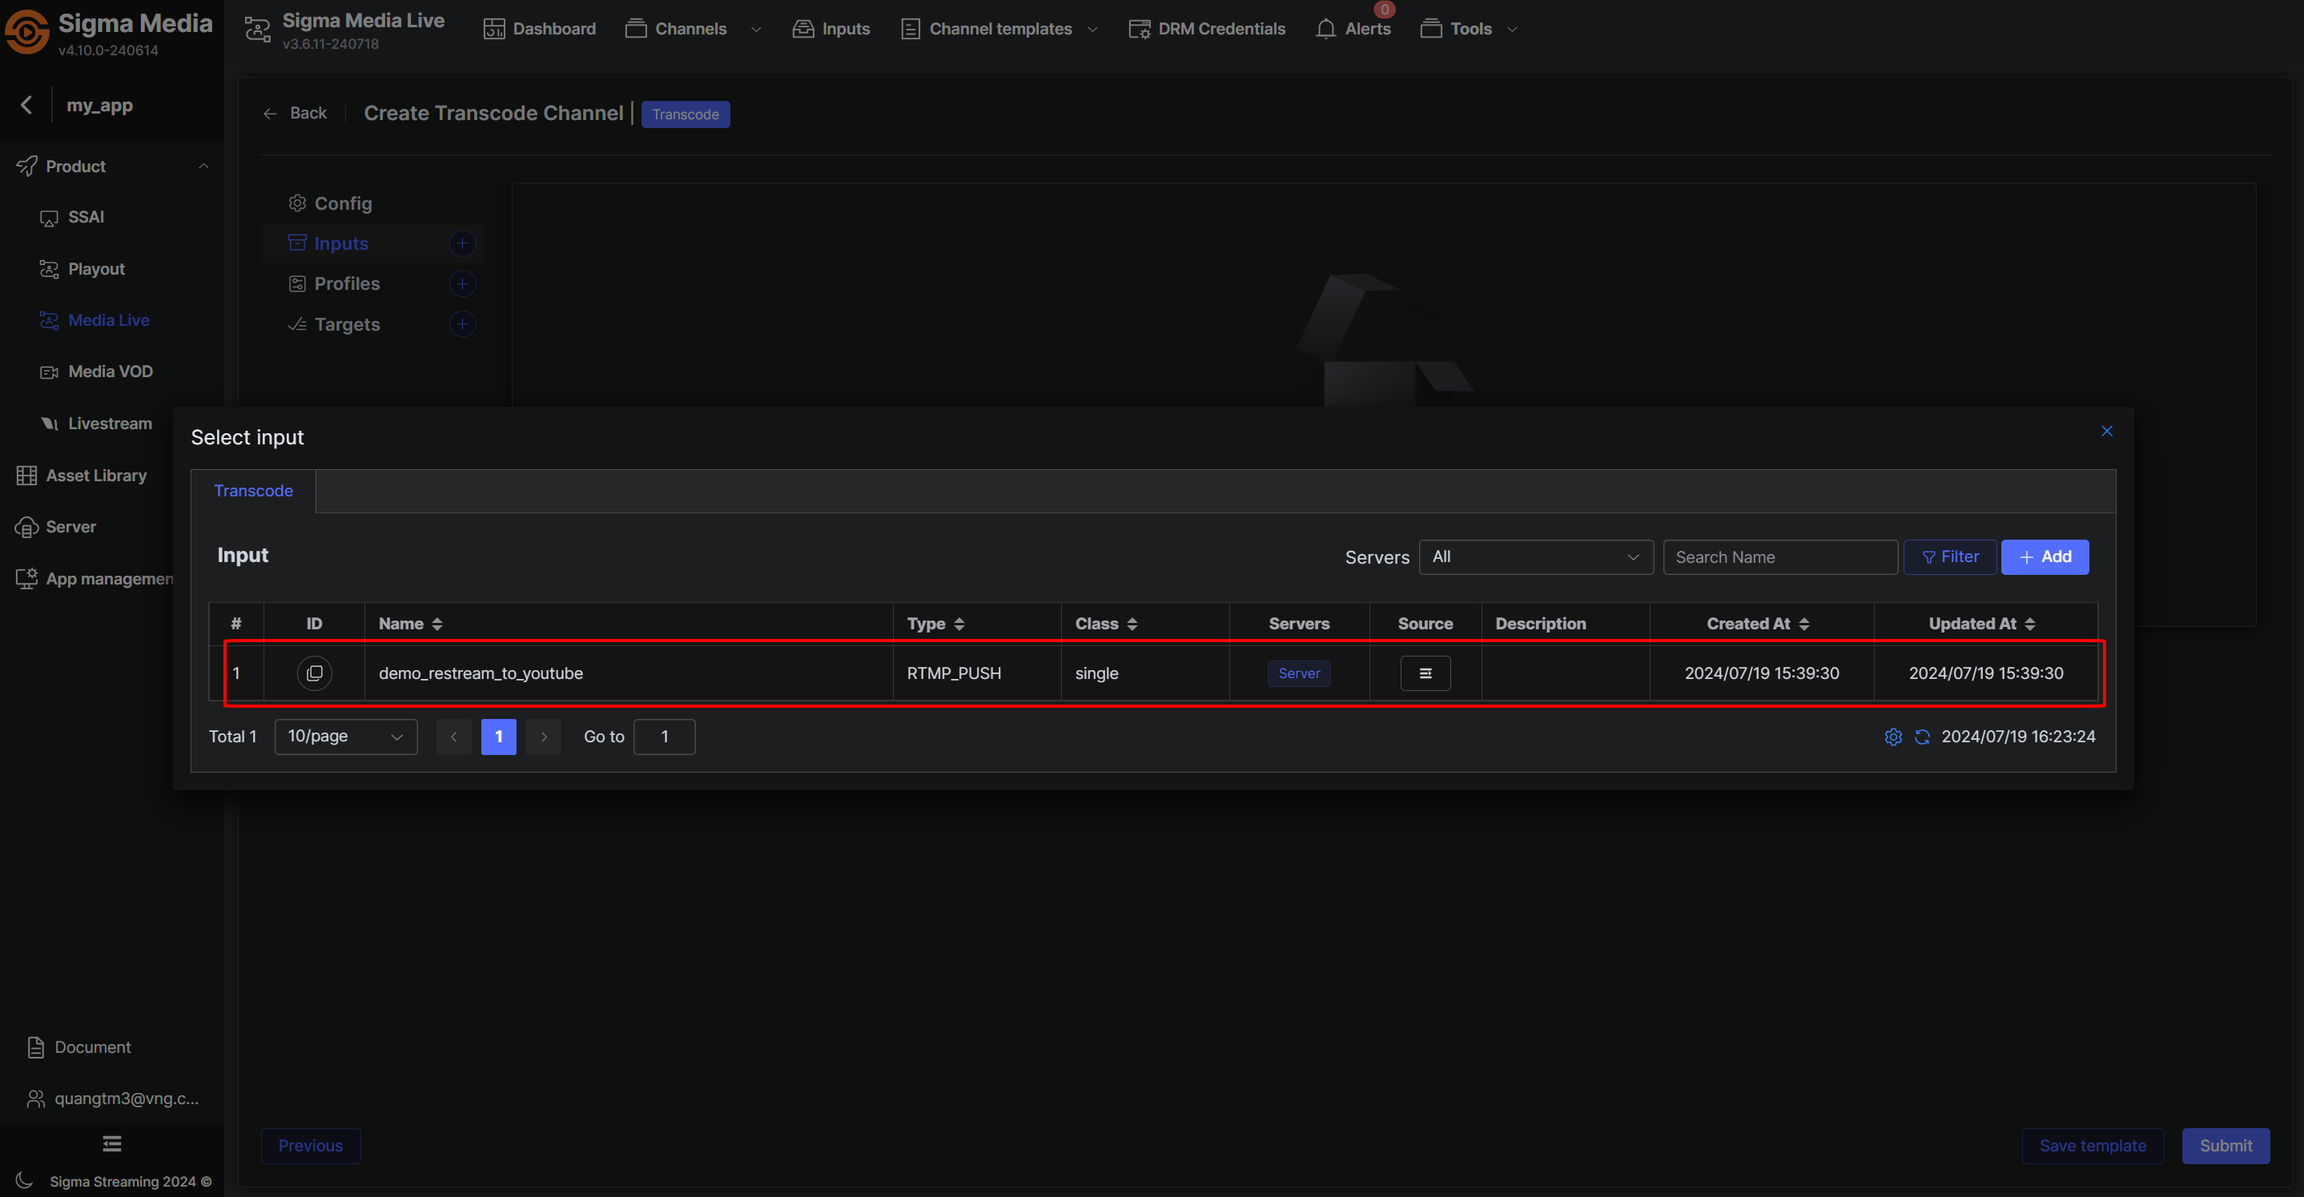
**Step 6:** After closing the **Create** screen above, the system will display **a list of** channel inputs. Here, you need to **select** the corresponding inputs:
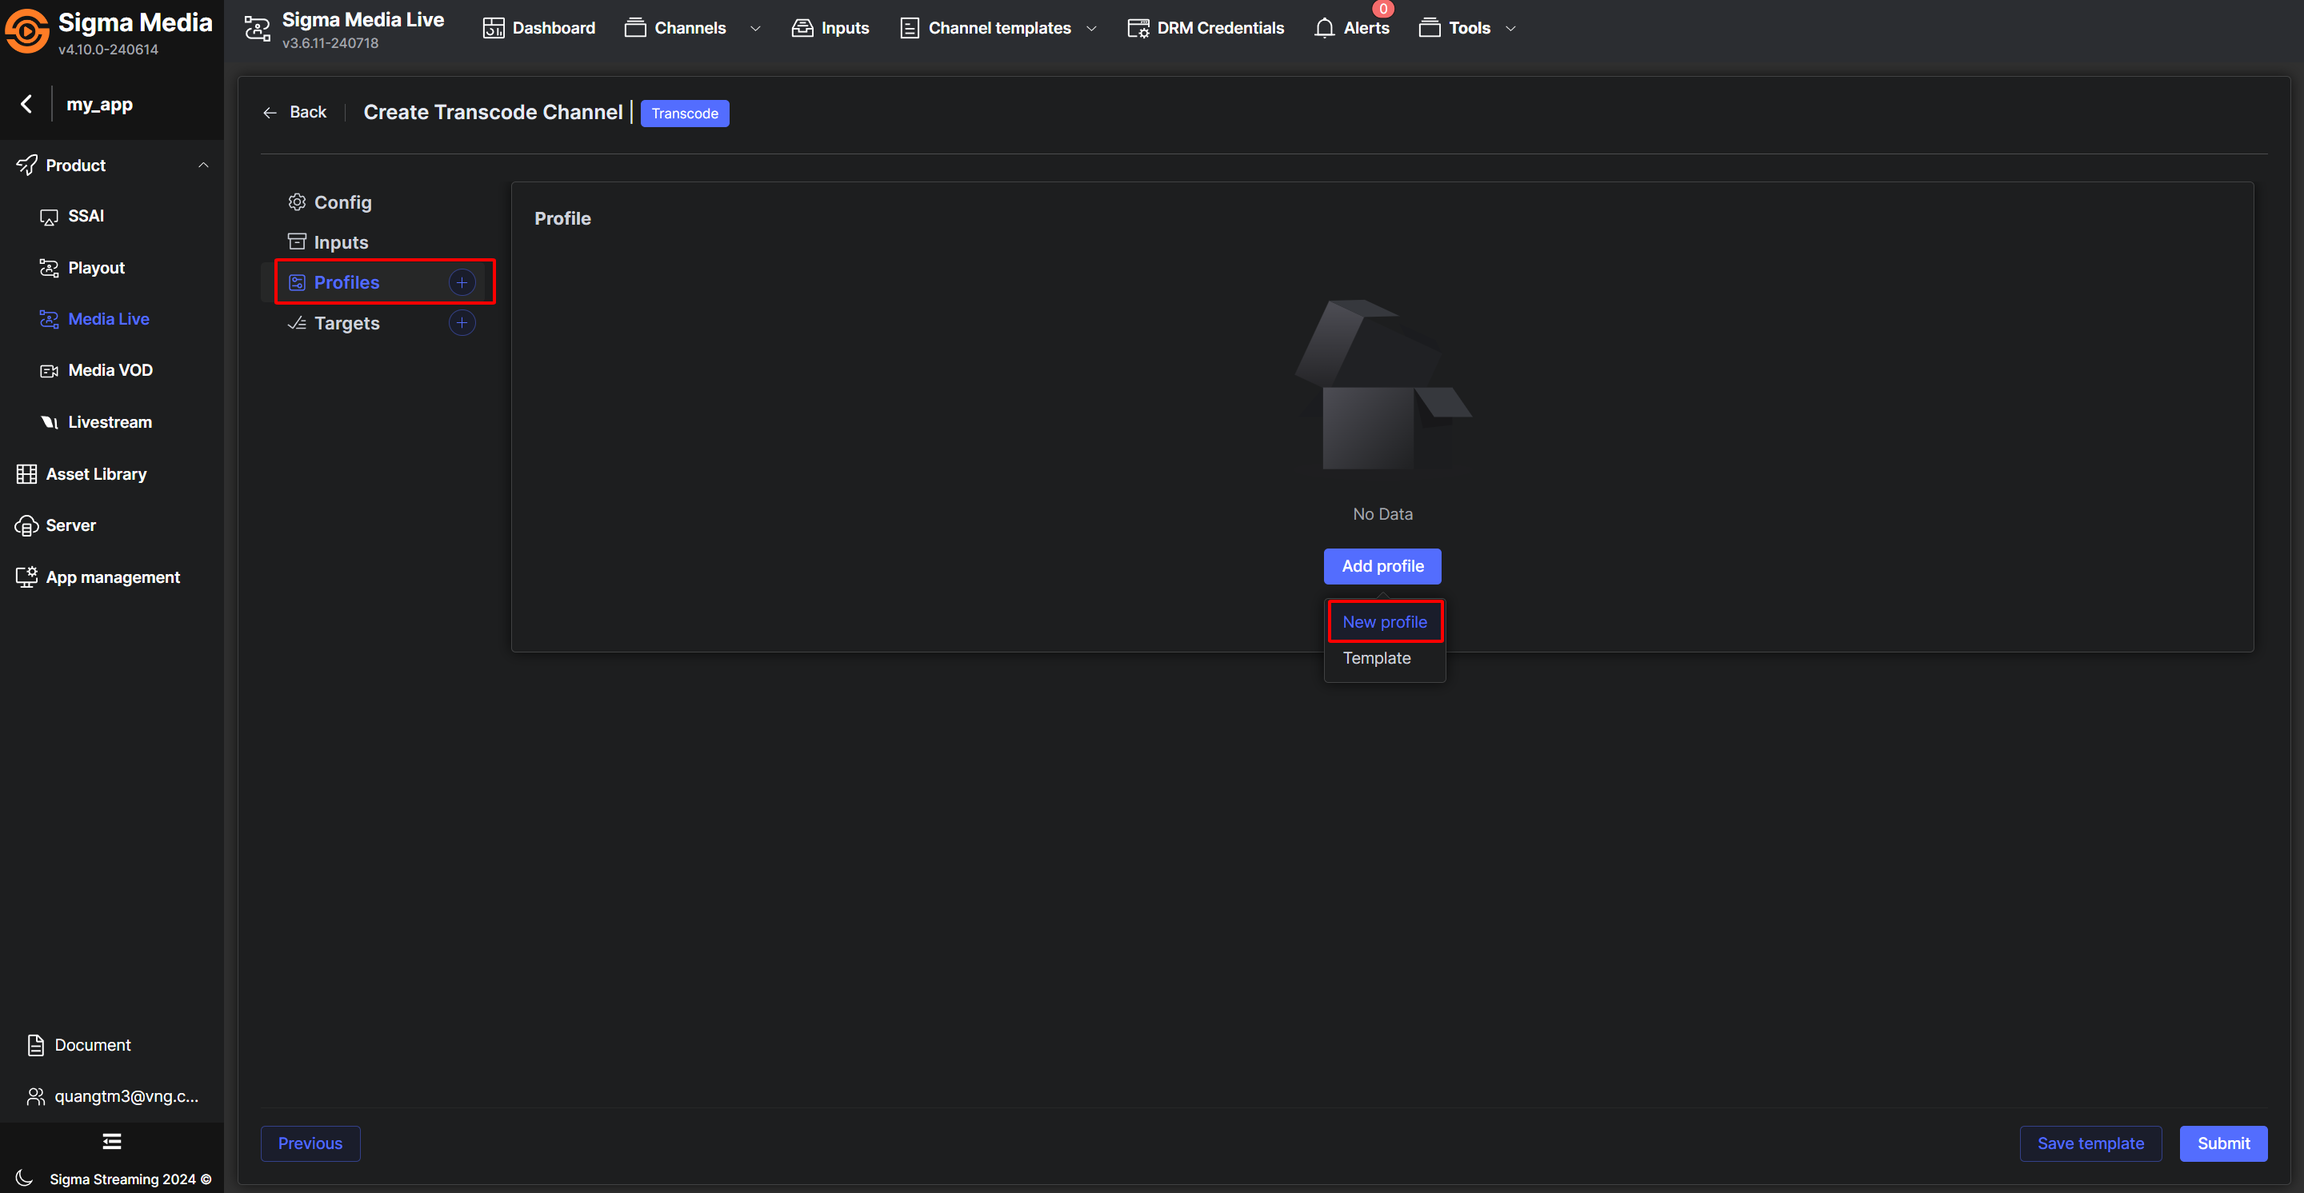
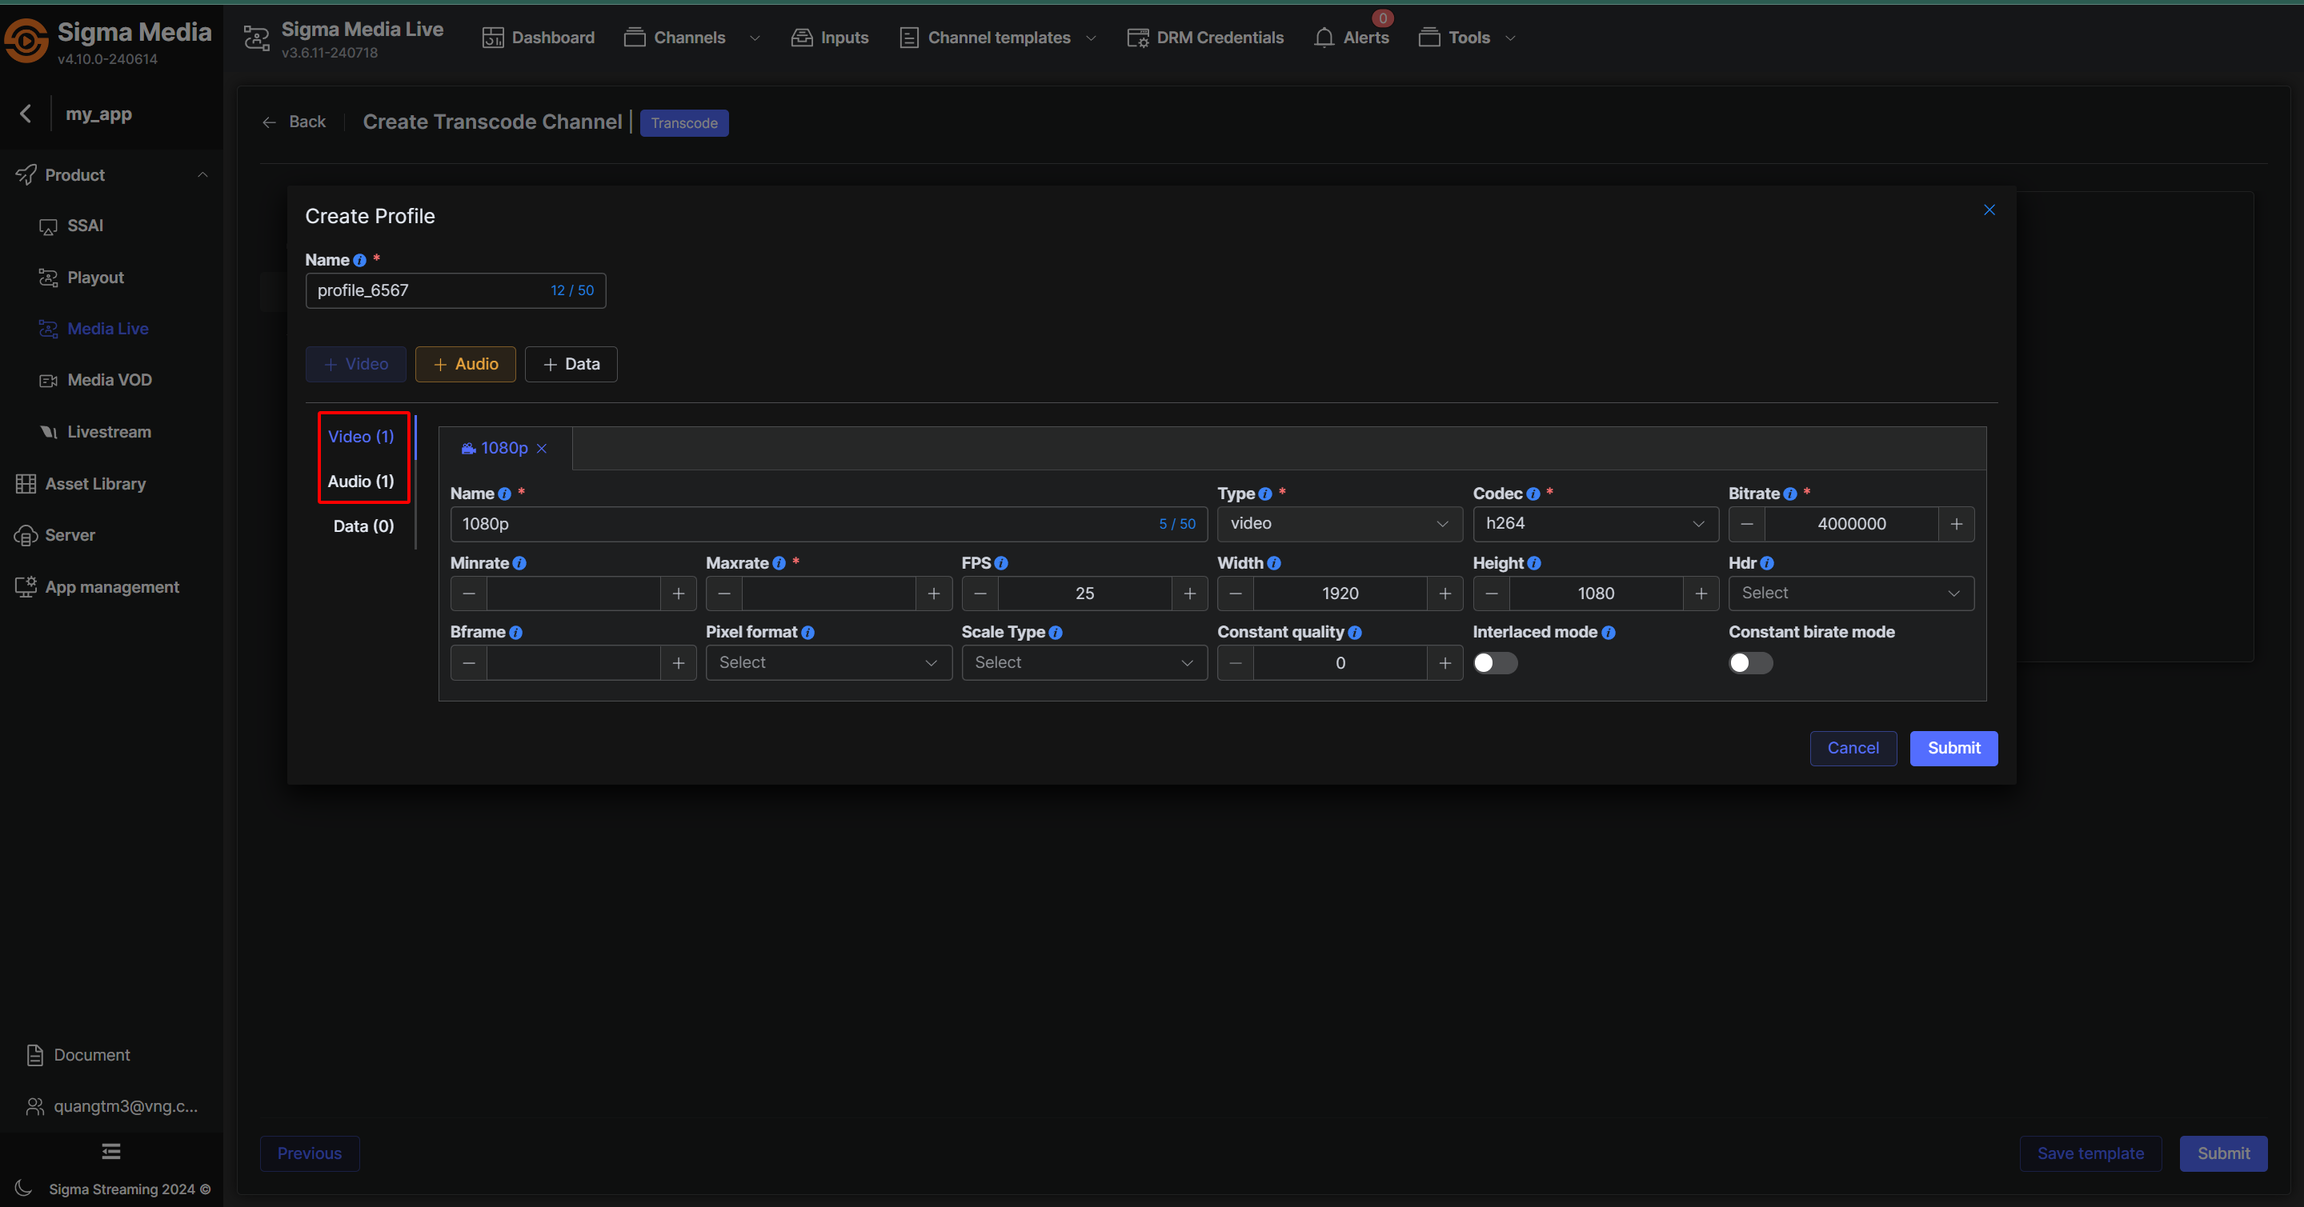
**Step 7:** In the **profile** tab , you enter the input profiles by selecting **Add profile** if it already exists or selecting **New profile** to create a new profile.
**Step 8:** In this example, we will add a 1080p **video** profile and a 44\_1khz **audio profile.**
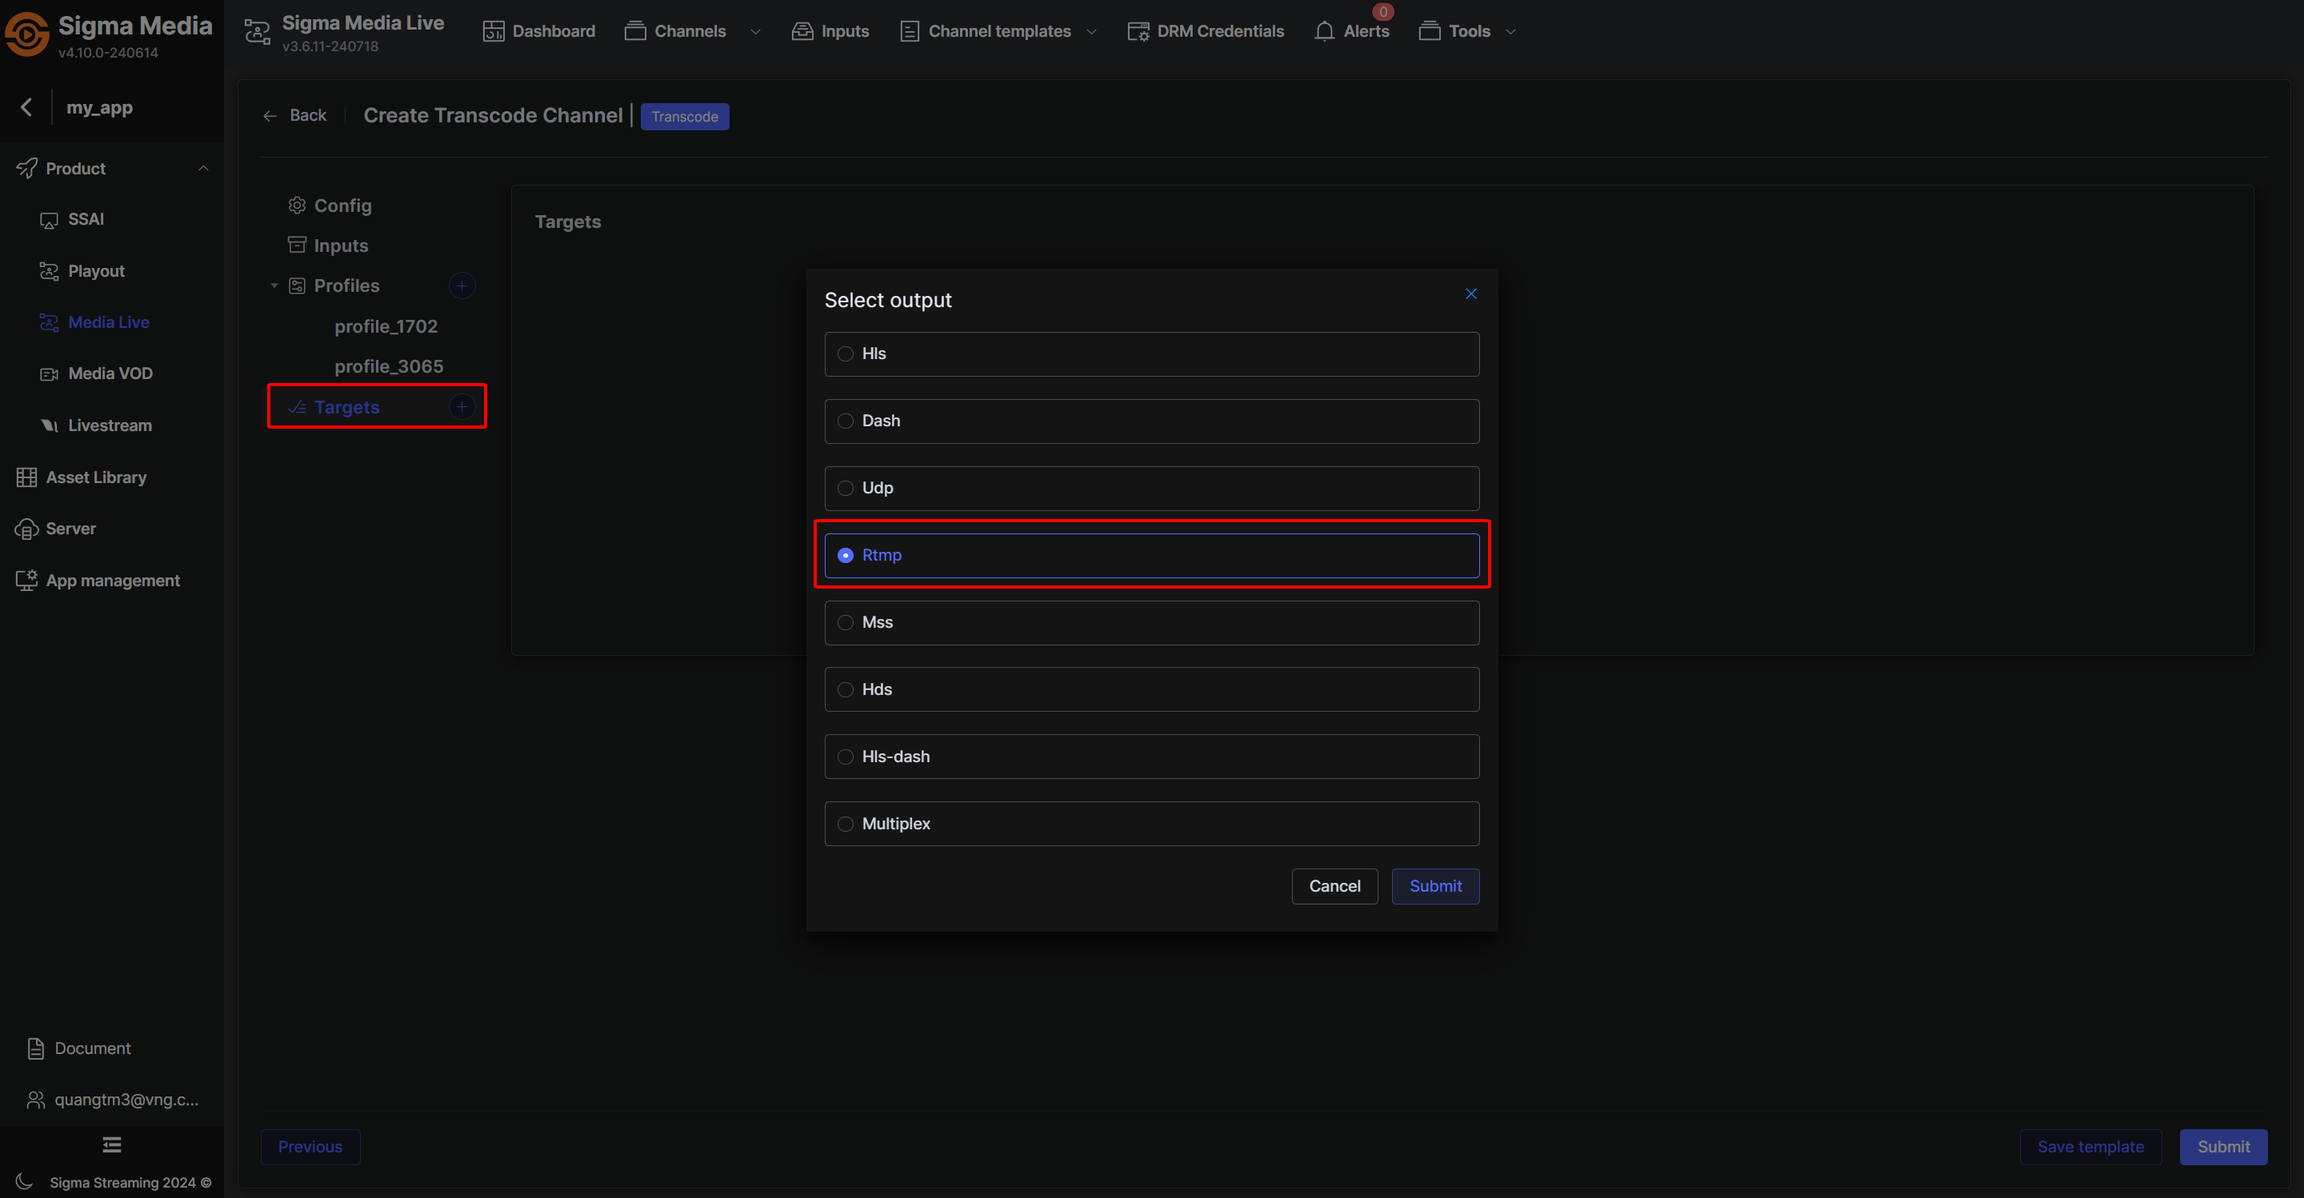
**Step 9:** Next, you configure the streams that you want to stream to.
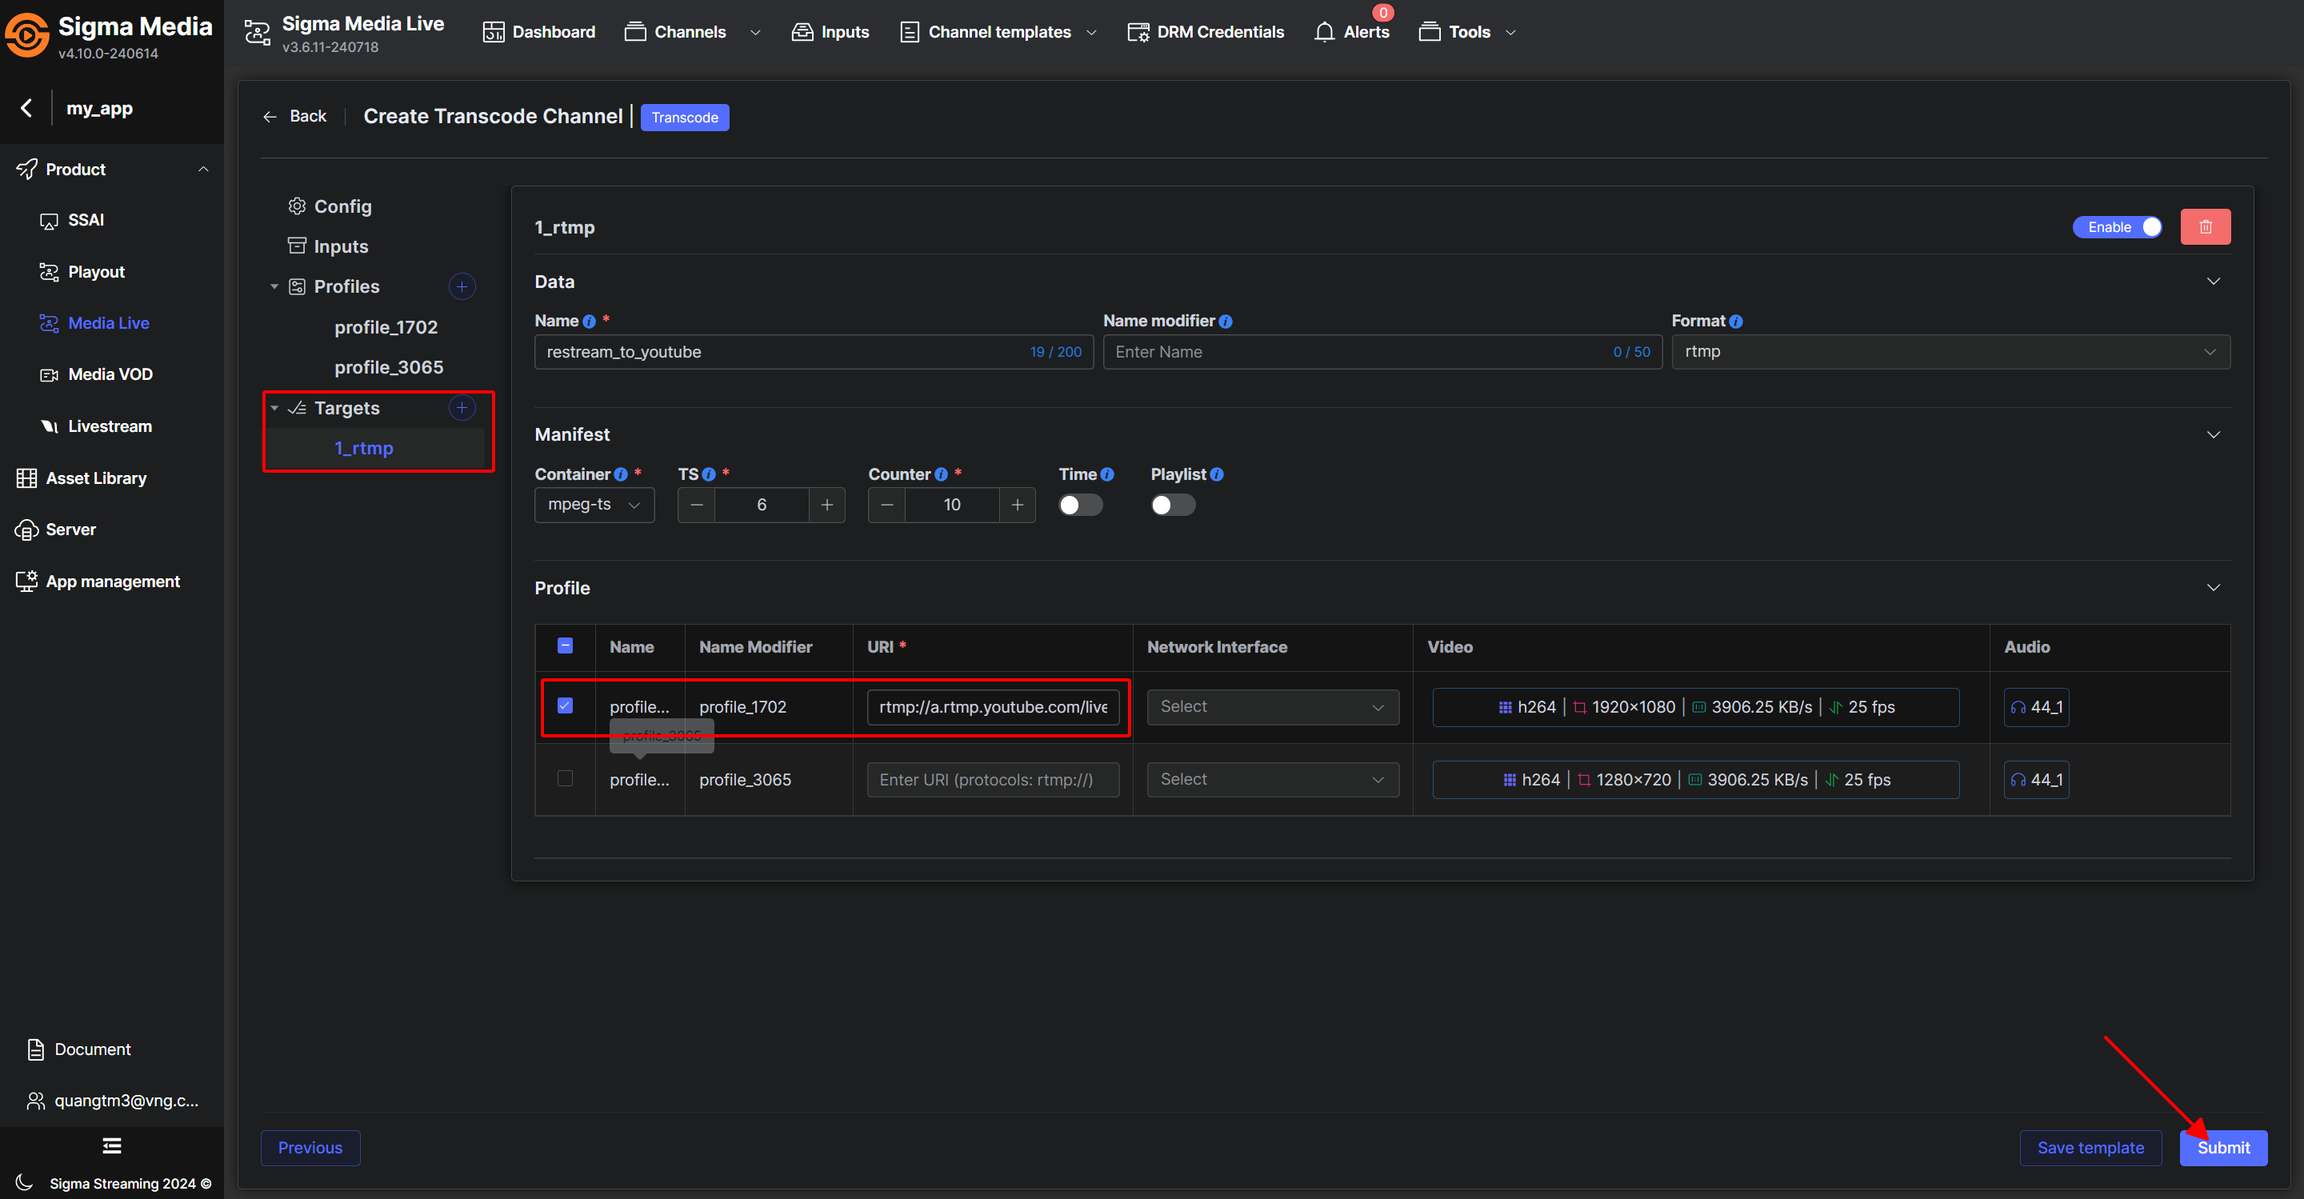
**Step 10: Enter RTMP** information then click **Submit**
**Similar to above, you can stream to multiple RTMPs simultaneously by adding configuration in the Target section.**
**After performing the above steps, the Input section will display the RTMP information receiving the stream. You can stream through the link in this section.**